
![]()
Forum member Giga Bread brings us another excellent tutorial today, this one is for that digital skin transfer that shows us all that while it’s a bit technical, it’s not all that difficult. The steps are simple and comprehensive, and even the novice customizer should be able to do this with little trouble if you follow the steps provided!
“Disclaimer:
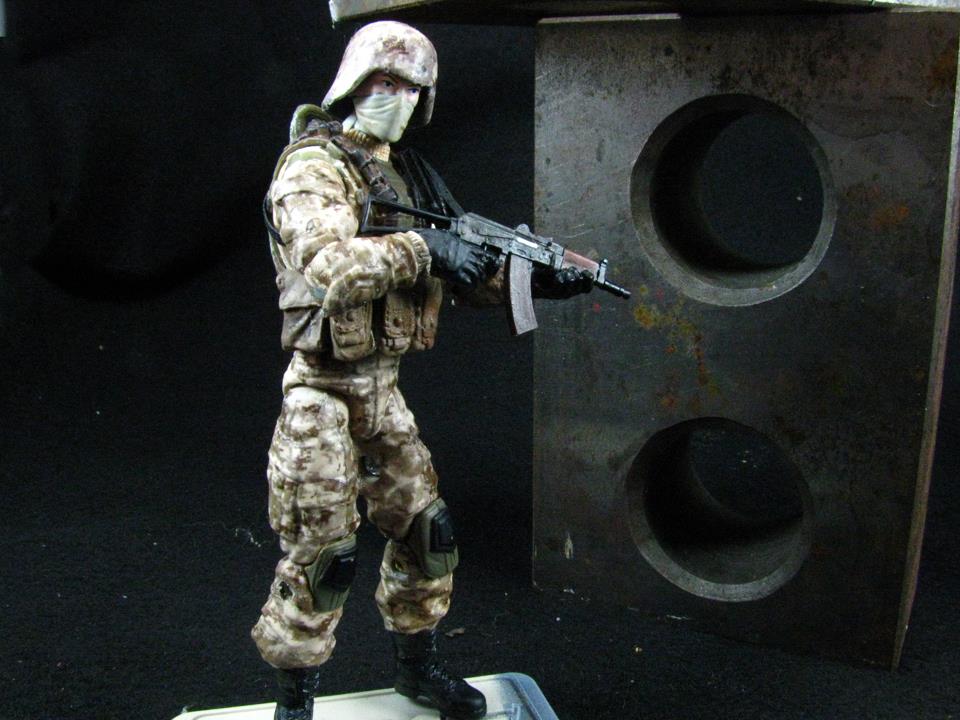
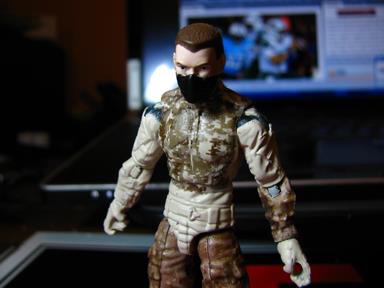
This method is still a work in progress. The method I chose for this tutorial may change at a later date as I continue to experiment. The finished figure is an example that used the method about to be shown.
Materials:
Container of clean water
Tape (any kind but electrical will do)
Hobby knife with a really sharp blade
Soft bristled brush
Tweezers
Matte Medium
Laser print with your texture
Not shown:
Slick, colorful work surface (I use a For Sale sign)
Some sort of backing surface for your print to be taped to (I’m using an old USPS mailer)
Your figure with the base color already painted.

Notes on making a pattern
You’ll want to decide which color is your base color in the pattern. What I’ve found works best is to make the lightest color the base color. Since this decal is going to be translucent, all of the light colors in your pattern won’t show up anyways, so you might as well paint that layer on the figure.
This is a nice tutorial on how to make a marpat pattern in photoshop. A lot of these techniques can be used with other patterns and just needs experimenting.
When you get your pattern done, switch your base color to white before printing. I also tiled mine into sections just so I can keep track of how much I’m using per figure and also to keep the direction of the pattern correct. The desert marpat pattern is kind of stretch across. Tiling the sections into wide rectangles help me keep the pattern’s orientation throughout the transfer process.
Steps for the transfer process:
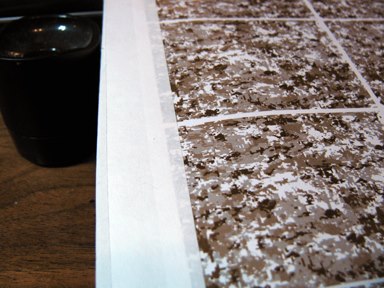
1. Make a laser print of your pattern. Inkjet will not work and will just create tons of frustration.
2. Tape the outside edge of the print to a hard backed material. A piece of cardboard, masonite, whatever.
3. Just go ahead and drip the matte medium directly onto the print.
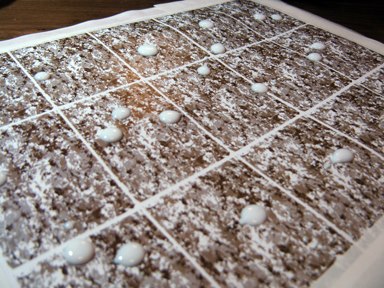
4. Using your brush, work the medium all over the page until you have a satisfactory even coat.
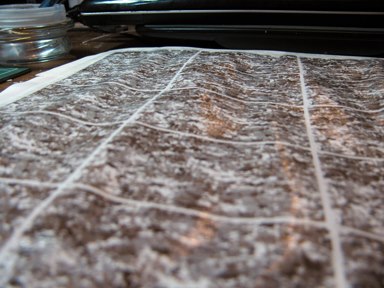
5. Let dry for an hour or so. In the meantime, you can finish any painting you have to do on your figure.
6. Repeat steps 3 and 4.
7. I work section by section, but while I do this, I do try to plan ahead and get camo sections to kind of line up over seams on the figure. In this step, cut out your first square and make sure you make a little bigger than the section it’s going on.
8. With your camo square/rectangle turned face down on a smooth work surface, wet the back of the paper and let it soak a few seconds.
9. Using your index finger, rub the paper off carefully and continue to roll up the paper fibers and wipe them away. You’ll want to work from the center out to the edges. Keep doing this until the paper starts feeling smooth.
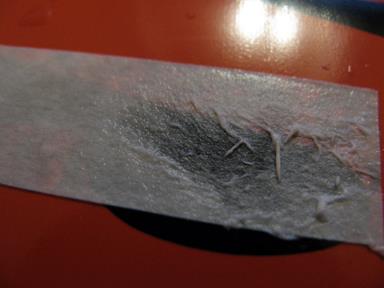
10. Use your brush and lightly go back and forth, dusting fibers off.

11. Let it dry. When it’s dried, any fibers missed with be visible and you can repeat steps 8-10 until you’re comfortable with the decal. Just to note, any fibers that get trapped between the decal and the figure will show up, so the more care you take with steps 9-10, the better end result.
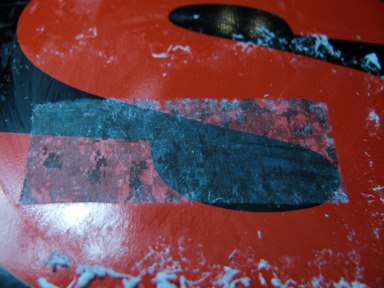
12. Now you’re going to want to separate your decal from that smooth surface. I usually use my knife to get a corner started and carefully pull back. Keep track of the surface that was face down and what surface you removed the paper fibers from. You’ll want the surface that had the paper removed to be the surface that bonds to the matte medium on the figure. This will ensure a clear image.
13. Paint a thin layer of matte medium on the part of the you’re placing the square. Let it set up a little and try to avoid pooling in the sculpted details.

14. Without making contact, line up your pattern over the piece you’re applying it to, making sure that the image is face up. Press the center of the pattern to the center of your piece. you don’t need to press hard at all as this will just cause your image to stick to your finger or thumb.
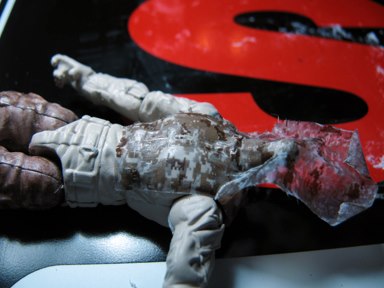
15. Just start pressing the image down, working from the center to the edges. This will help push excess fluid out. If the surface feels a little tacky, wet your fingers to keep from pulling the pattern off. Any overhang, just leave until it dries. It will be easier to cut off then.
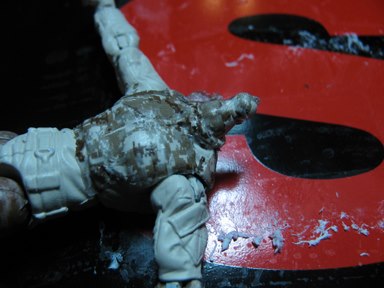
16. I usually keep pressing around the details but I have noticed that as it dries, it will pull the decal into the details. Any edges that start coming up can be fixed with more matte medium.”
Thanks, Giga, for sharing this tutorial with us here at the Fighting 1:18th! We hope that this will help everyone who has wanted to do this but has had questions or doubts. Doubt no more, and for questions and comments, join the discussion HERE.


Great Tutorial and that figure looks sick!!! I would army build him like crazy