
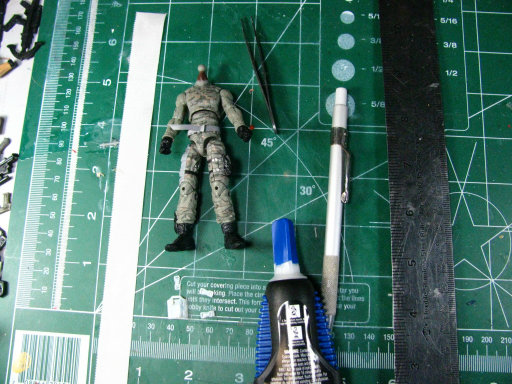
What you’ll need:
1) The MP9 Holster Set (this is printed in White Detail)
(optional) A printed pistol belt buckle from the MSF Stabo Gear Set.
2) x-acto blade
3) some sort of magnification lamp helps a lot
4) cork backed ruler
5) tweezers
6) super glue (preferably a fresher bottle, unlike mine)
7) medical tape folded over (what I’ll be using), micro canvas (what I prefer), or heavy paper. The heavy paper is usable but not recommended for this construction as the straps will need to be pulled tight.
8) the figure it’s being constructed for
9) wire snips
Tips:
1) Don’t sneeze, exhale in frustration, or work next to an open window on a breezy day. Once your printed items are separated from the sprue, they can easily be lost forever.
2) When clipping sprues of printed items, always use wire snips. Bending it until it breaks can often break what you don’t want broken and an x-acto knife puts too much force on one side of the cut. You need to use wire snips because it spreads the pressure on both sides of the piece being cut and they can get much closer to a joint when cutting.
3) Immediately bag up printed parts not being in use.
Last tip: Finding one of these on clearance at Hobby Lobby is awesome. I highly recommend some form of magnifying device when modeling.

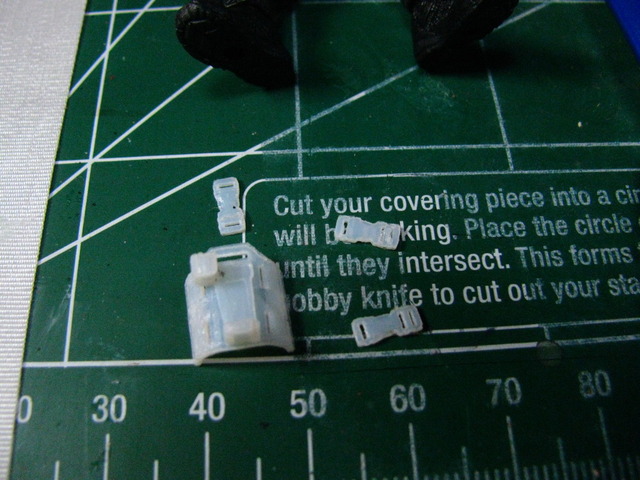
Here is the set printed in White Detail. The buckles are a little larger than desired but this makes them durable enough for the exercise.
I label it as optional but I will be showing how to connect the holster to the pistol belt for those with an extra buckle lying around from the MSF Stabo Gear Set. Details on how to construct this belt can be found HERE.
Just remember to leave the belt loose on one end so it can better positioned with the holster in the final stages.

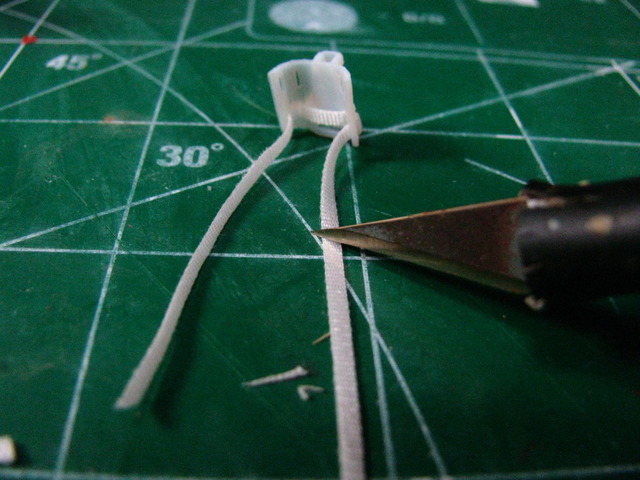
First up, a discussion on these buckles. They are printed in a different material from the stabo gear and this makes them appear thicker. Before even attempting to slide the material through these openings on the buckles and holster, use an x-acto blade and score the insides to give yourself a little more room to work the material.
The ruler shows that these openings are much smaller than on the stabo gear because they are intended for leg straps. Ensure that when you cut the material, it’s under 2mm wide.

Go ahead and cut out a strap that’s less than 2mm wide and make sure you have plenty of slack. Cut a point to one end as this will make threading through the holster easier. Every 1-2 openings that this strap slides through will fuzz this point up, so it’s best to regularly recut the point.
Starting on the front-most opening, slide the strap through from the underside. It’s easiest to grab with the tweezers near the point when trying to fit it through.
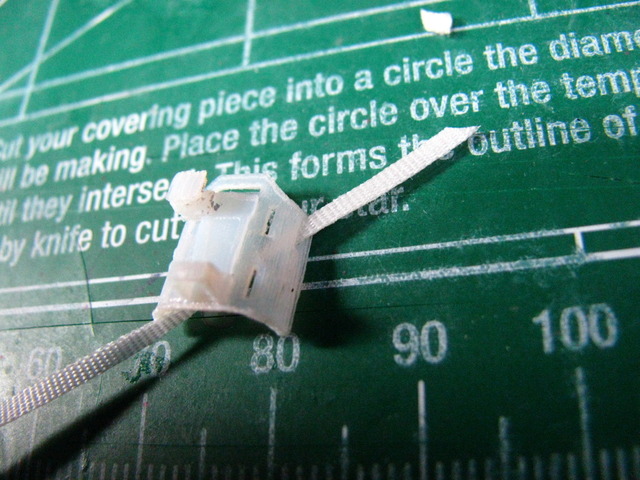
Then feed it through the next hole on the topside. You’ll find that you’ll have to keep freeing up more slack as you go.

Slide it up through the next hole.

Now pull it through the final hole and feed slack through until you have plenty to work with.
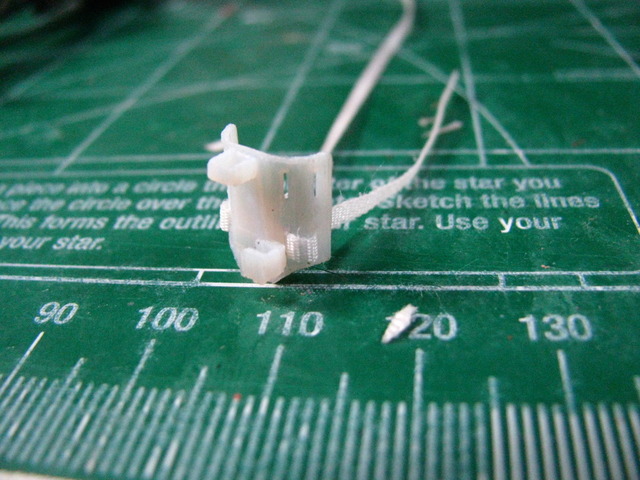
This is probably disorienting but I’m cutting off a bunch of excess where the strap will be crossing over the front thigh. I cut a point at the end because we’re about to slip a buckle on.
Slide the buckle on, with the strap going over the topside and through the underside, leaving about a 2mm gap between it and the holster. Be sure to get the detailed side up.

Place a spot of super glue, fold over and pinch with your tweezers. Clip the excess with the wire snips.

Now repeat the process for the other leg strap.
Take a breath, and click here to continue to Page 3.


![[NEWS] M-114 Up Armored Tactical Vehicle Kit by Pickelhaube](https://www.fighting118th.com/wp-content/uploads/2014/11/Pickelhaube-Up-Armored-kit-22-272x125.jpg "[NEWS] M-114 Up Armored Tactical Vehicle Kit by Pickelhaube")
![[Tutorial] Scrimming by TIE_FighterTk069](https://www.fighting118th.com/wp-content/uploads/2014/11/Scrimming-Tutorial-1-272x125.jpg "[Tutorial] Scrimming by TIE_FighterTk069")