
![]()
Courtesy of forum Officer Fled74!
Before I begin, I have to say that this tute works best with good, clear photos. Photoshop will not make a poorly-taken, blurry photo magically better.
I must also say that I am by no means a Photoshop guru. More skilled people will have their own way of doing things, but this way works fine for me.
Anyway, it’s been quite a while since I promised to make this tutorial for you guys. Apologies to all the guys who PMed me about it.
Although it seems long and complicated, believe me, making the tute and taking screenshots were far more time-consuming than just adding the effects.
I’m using Photoshop 7 for this, but I’m pretty sure the techniques will work for other versions. You can probably find a torrent or something, although I’m not telling you guys to go DL some overpriced software…
You could try using GIMP, which is freeware, but I’ve never tried it myself so I’m not sure if it uses image layers the same way as Photoshop.
Anyway, here we go, and remember to SAVE OFTEN.
STEP 1
Open the pic you want to edit. I’ll be using this pic of my custom Scarlett that I took for a dio story.
Now is a good time to resize your pic and adjust brightness, etc..
Once you’re happy with it, open the muzzle flash image in a new pane. There are tons of free stock pics out there, just use Google Image Search or something.
Select the Rectangular Marquee in the Tools pane on the left, then select the muzzle flash.
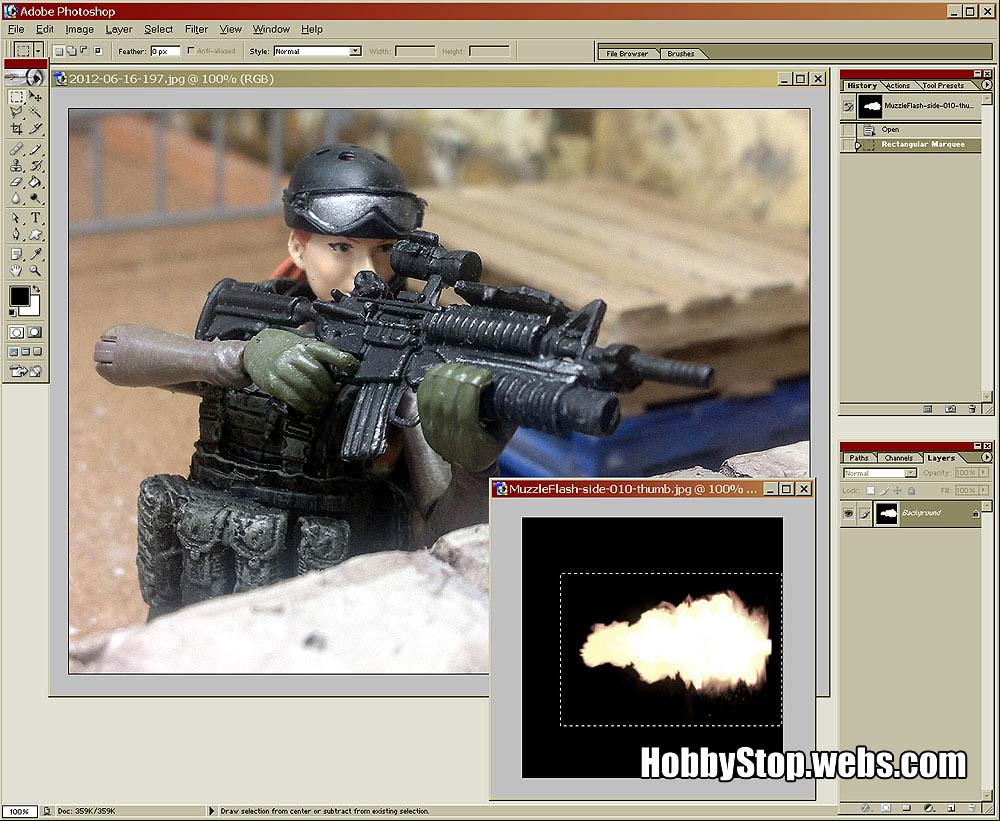
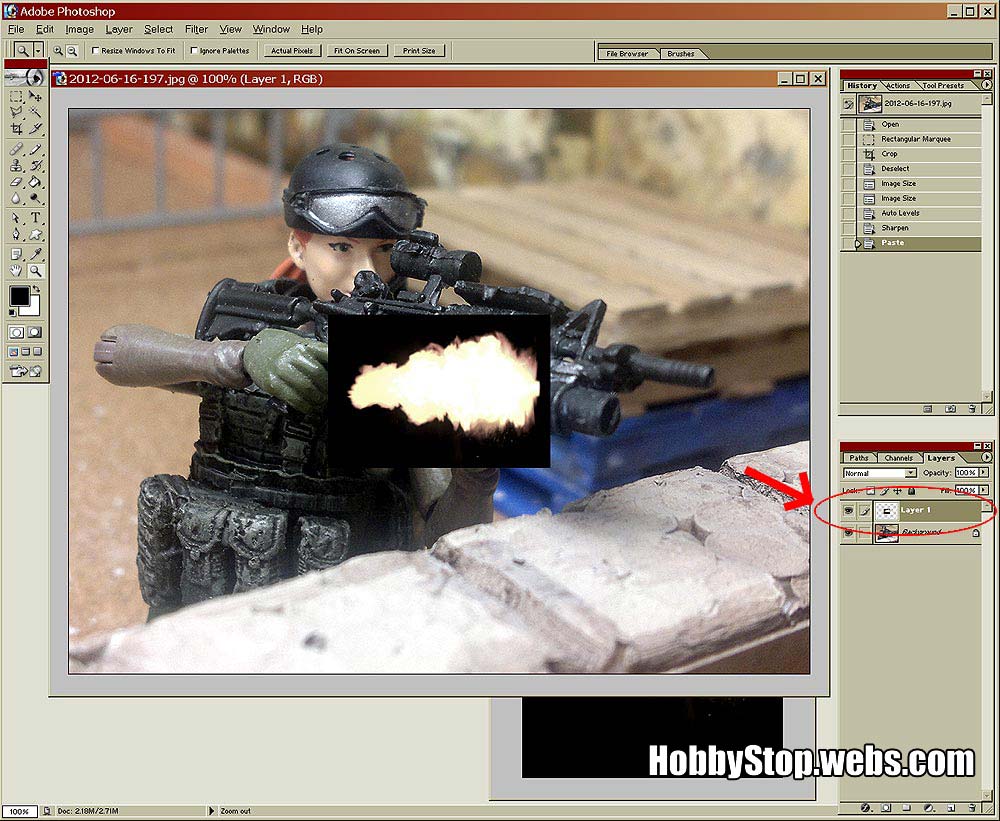
Press Ctrl-C to copy the muzzle flash, then click the image pane and hit Ctrl-V to paste. Note that it is pasted on a new layer (Layer 1) automatically.
Go to Edit>Transform>Rotate. This will create a bounding box around the active layer (the muzzle flash, in this case)
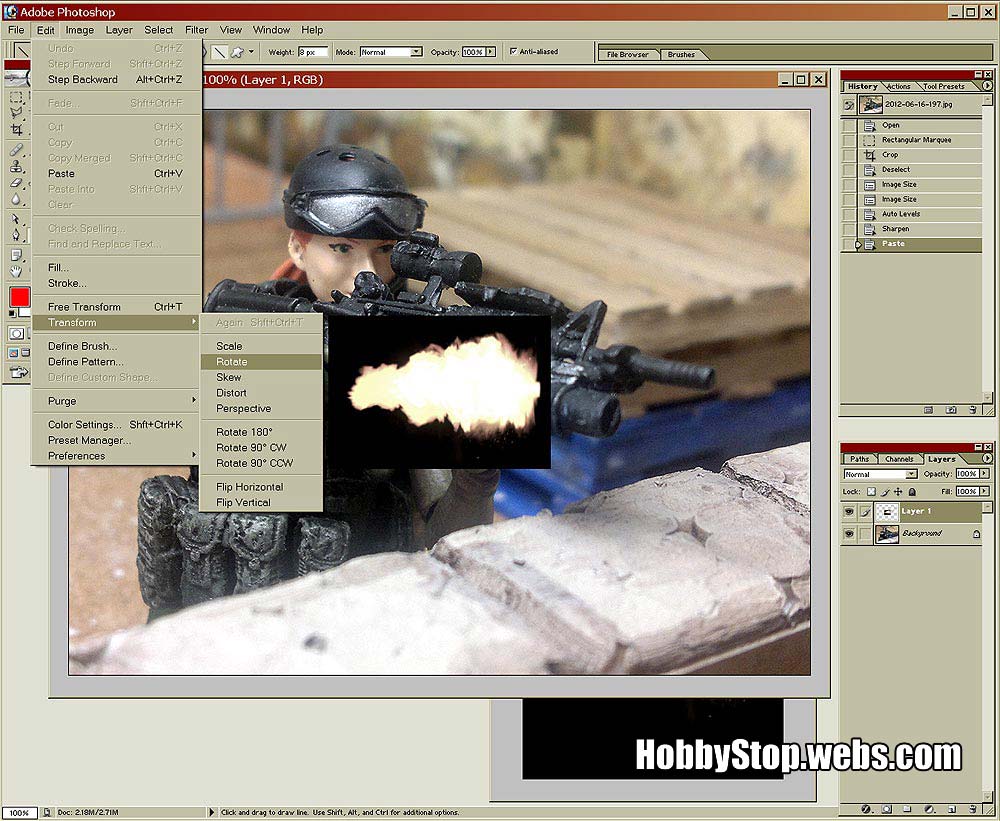
Click and hold on a corner of the bounding box, then drag to rotate it. Be sure to match the angle of the weapon.
When you’re satisfied, click anywhere on the left-hand Tools pane to apply the transformation.


