
PAINTING AND WEATHERING:
Once the carving was done, I did a quick sweep over all the walls with a large paintbrush just to make sure all the loose foam bits were knocked off. I then took some black acrylic paint that I got at Michaels (“Basics” acrylic paint, found in a large tube. I usually use Tamiya paints for my custom figures, but for this application, the cheap craft stuff goes far and works great for the larger area purposes).
I covered the entire wall sections with a good black base coat, using cheap foam brushes found at Michaels. If you miss some areas and don’t get a completely solid black coat, it’s fine as long as some black gets on the pink foam, because it ends up looking sort of brickish anyways. With blue foam, you’d probably want more solid coverage. I added a bit of water because you want to get the black into all the deep crevices and cracks without any foam showing.
I let all 3 walls dry overnight and started fresh in the morning on the color coats, and although waiting that long isn’t necessary, I would suggest waiting until the base coat dries completely. The foam retains water a tad longer than plastic, canvas or wood, so drying time tended to last longer than normal. Once it was dry though, it wasn’t tacky or anything, and ready for the detail paint.
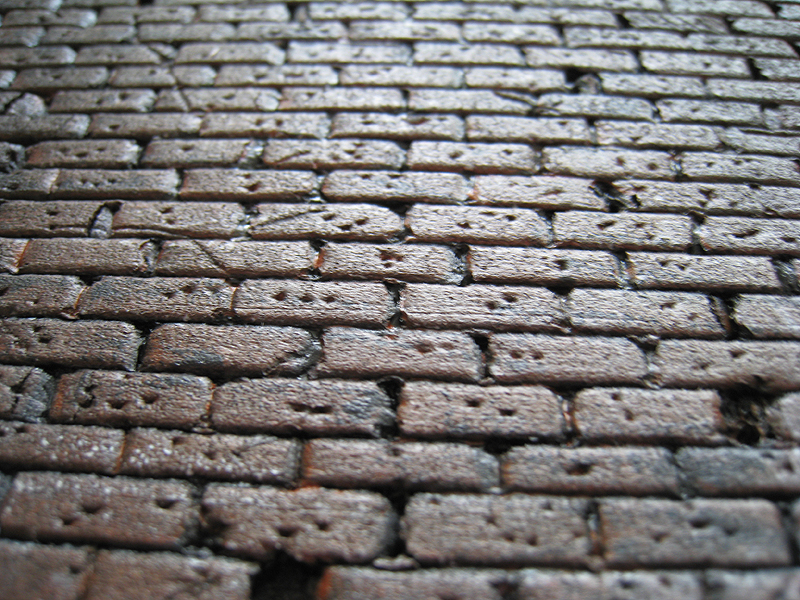
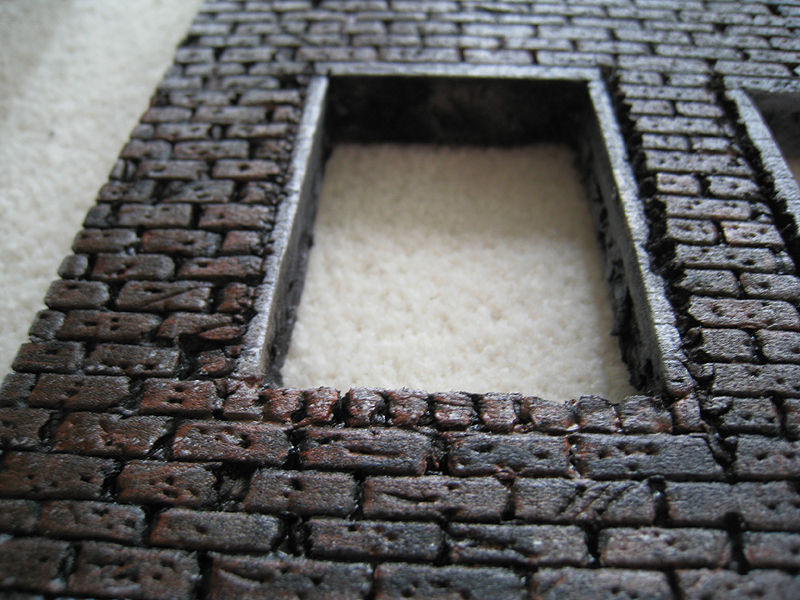
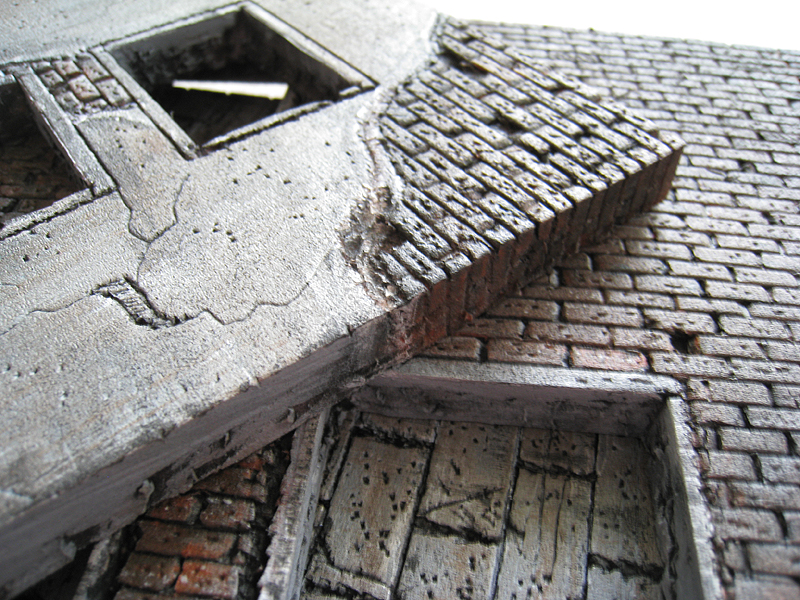
I started with the brick, and took a good “brick” or rust-colored paint (all paints used for the larger areas were “Basics” Acrylic paints, easily available at Michaels) and poured it out evenly onto a plastic container, and got a good clean covering on the foam brush. I think dragged the brush with the grain and against the grain of the brick pattern, but not pushing too much color into the crevices and cracks. By doing this, the black “mortar” lines and cracks and dents kept their black color and gave some good depth. I repeated this process with the concrete and cinder block wall sections as well, with the only difference being that I mixed a custom gray from black and white (I only used 4 colors for the walls: black, white, brick and brown, but I did mix them for different washes).
There really isn’t a process for the steps between the black base coat and when I finished, as each person will probably want to add their own level of detail to their own satisfaction. Also, I forgot to document these with photos, as I got caught up in the painting. But really, the detail work is really up to the individual artist. I’m sure I’ll revisit these walls down the road, as they can be repainted for different uses.
Some techniques that I used were as follows:
• Wet brushing: I got really swampy water/paint mixtures to create water damaged areas and for runs. You can brush on and let gravity do the work for you, and have realistic water drips, or brush them on yourself.
• Dry brushing: I drybrushed a lot of the white highlights on the bricks. I would follow the top edges of the bricks and go across the row, and then go back with a dry foam brush and drag with the grain, or against, depending on how I wanted the effect to be for different wall sections.
• Stippling: Simply getting a little paint on a dry brush and dabbing instead of brushing. I did this mostly on the bricks with white and black, and worked my way across, letting the different coats dry before doing the next. It really helped to add some very fine details, that you can hopefully see in the photos below.
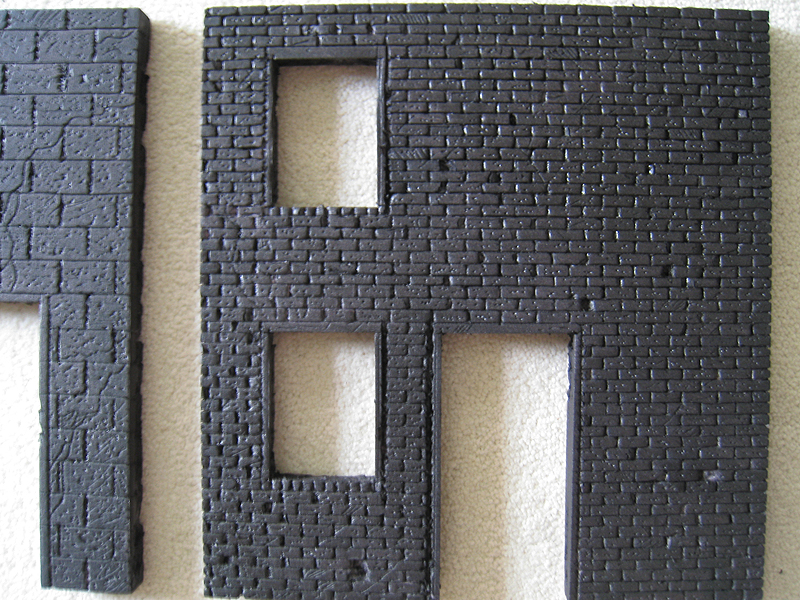
Black base coat:


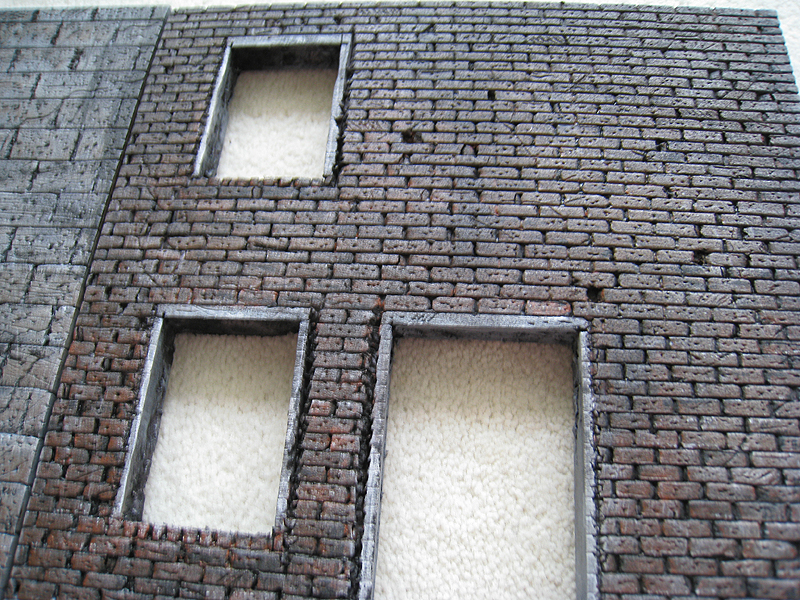
And the finished walls:


![[NEWS] M-114 Up Armored Tactical Vehicle Kit by Pickelhaube](https://www.fighting118th.com/wp-content/uploads/2014/11/Pickelhaube-Up-Armored-kit-22-272x125.jpg "[NEWS] M-114 Up Armored Tactical Vehicle Kit by Pickelhaube")
![[Tutorial] Scrimming by TIE_FighterTk069](https://www.fighting118th.com/wp-content/uploads/2014/11/Scrimming-Tutorial-1-272x125.jpg "[Tutorial] Scrimming by TIE_FighterTk069")
One comment
Pingback: Barkács sarok – Habszivacs dioráma | Urban Cobra Strike Force - G. I. Joe Hírforrás