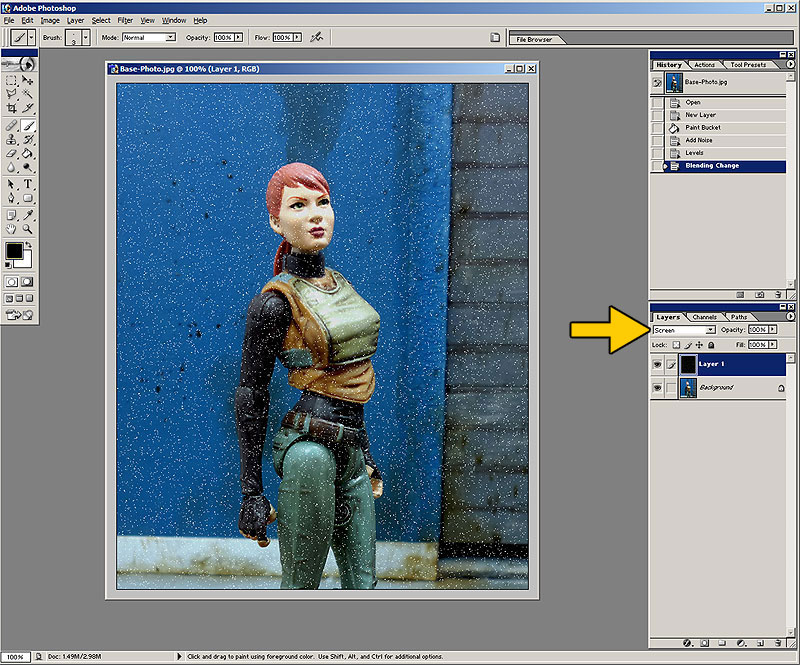
Here’s what we’ll end up with:

Honestly, taking screengrabs and describing the steps took much longer than making the above image.
Anyway, let’s get started
1.) Open your base pic in Photoshop. You can resize it by clicking Image>Image Size, then adjusting the width or height, making sure “Constrain Proportions” is selected.

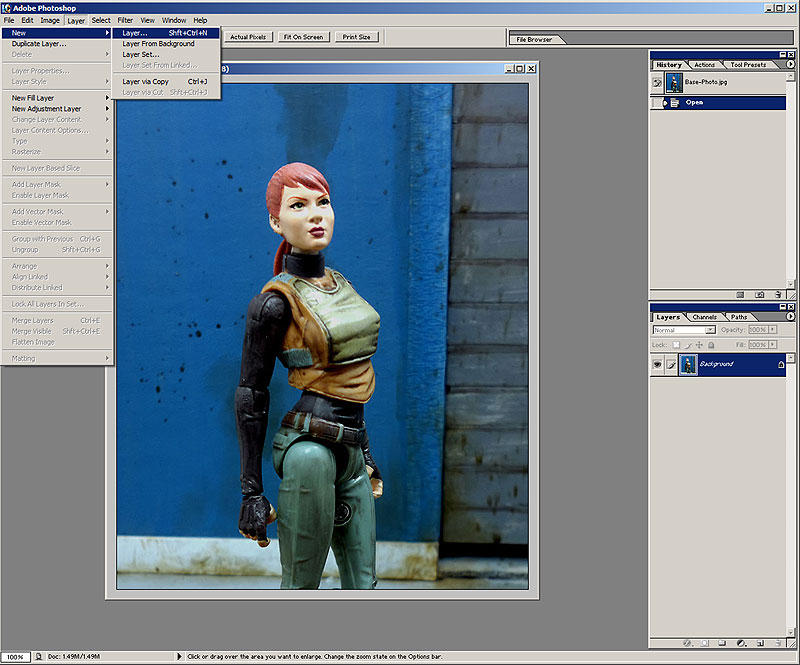
2.) Create a new layer with Shift+Ctrl+N. You can name the layer anything you want.
3.) Fill the new layer with black, using the Paint Bucket tool in the left-hand menu.

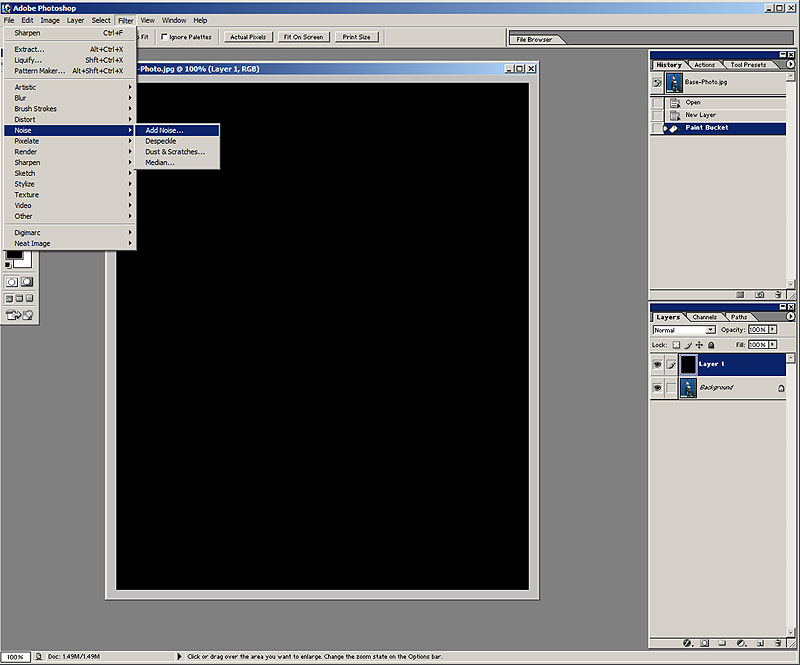
4.) On the top menus, click Filter>Noise>Add Noise.
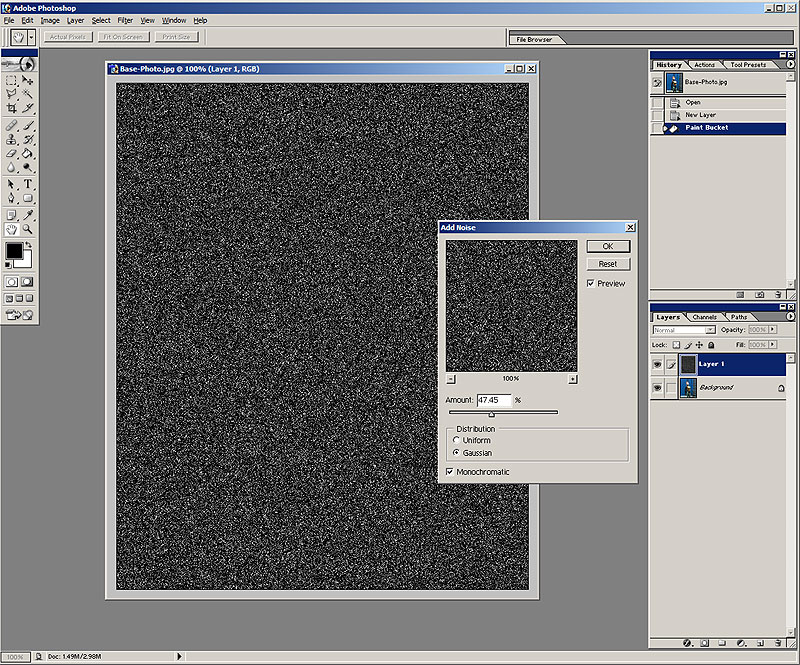
5.) This brings up the Noise pane. Adjust the slider between 40-50% noise. Make sure the “Gaussian” and “Monochromatic” boxes are selected. Hit OK when you’re satisfied.
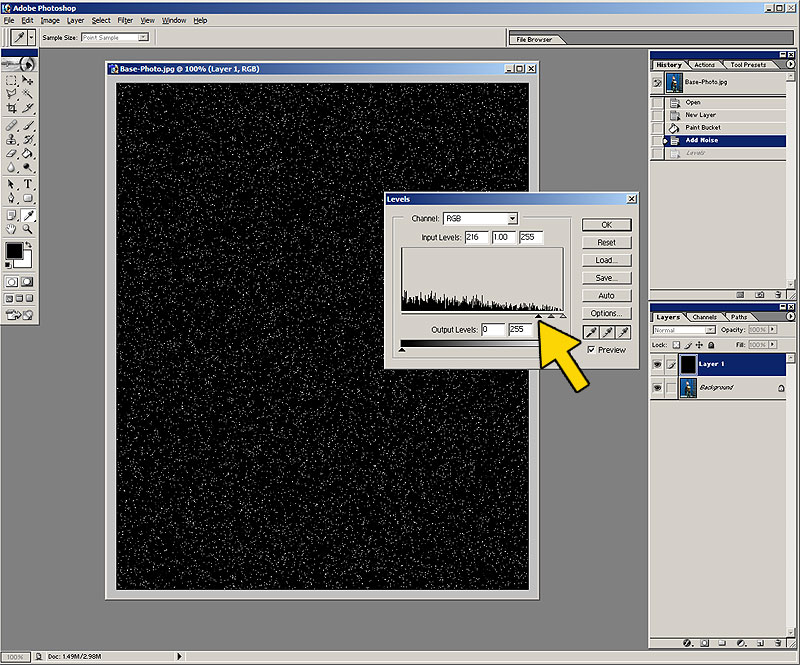
6.) Back to the top menus. Go to Image>Adjustments>Levels to bring up the Levels pane. Move the left-most slider (yellow arrow) over to the right, to reduce the number of white pixels. How much is up to you.
7.) In the Layer Options drop-down menu, select “Screen”. This makes the black invisible.