
First off, let me apologise for the long delay in creating this tutorial. I blame Max Payne 3 and Grand Theft Auto 4 for being too damn addictive.
Anyway, here goes.
Blood has always been a distasteful subject, but during the course of diorama photography and the pursuit of greater realism, we may eventually encounter dio situations where bloodshed is necessary.
Applying actual "blood" (Halloween blood or similar) to your diorama is certainly effective, but not everyone is willing to potentially stain a prized dio piece or figure. Also, blood spray is a very difficult effect to achieve "in camera" at such a small scale.
This is where programs such as Photoshop come in.
There are many websites that offer free downloadable user-made Photoshop brushes (Google will help you find them), but for this tutorial I chose to make my own image overlays instead:

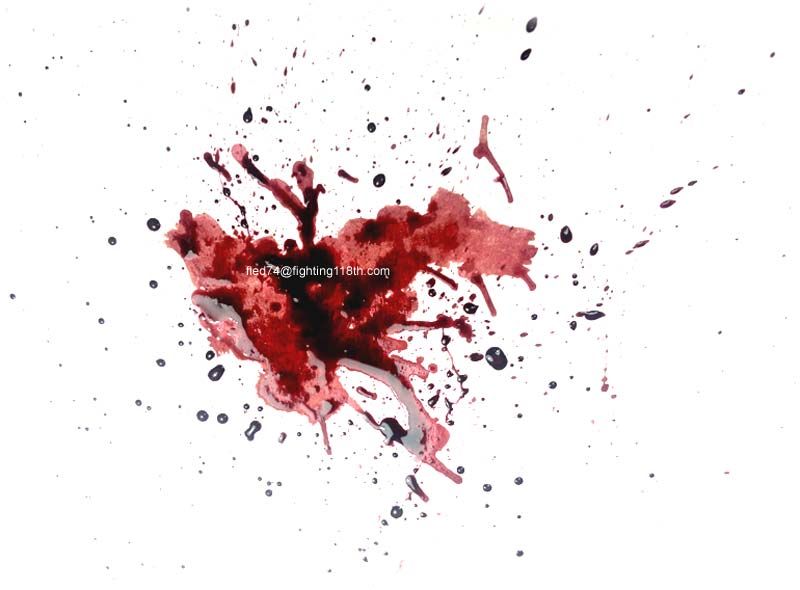
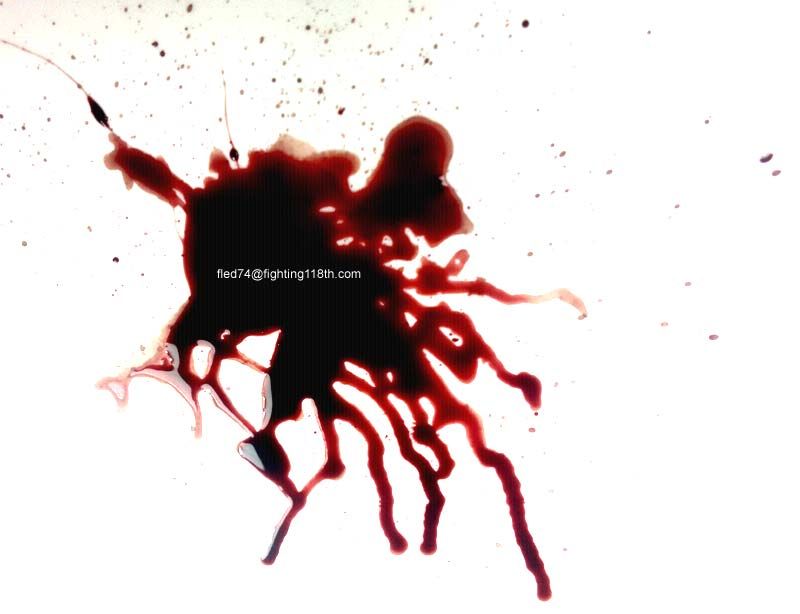
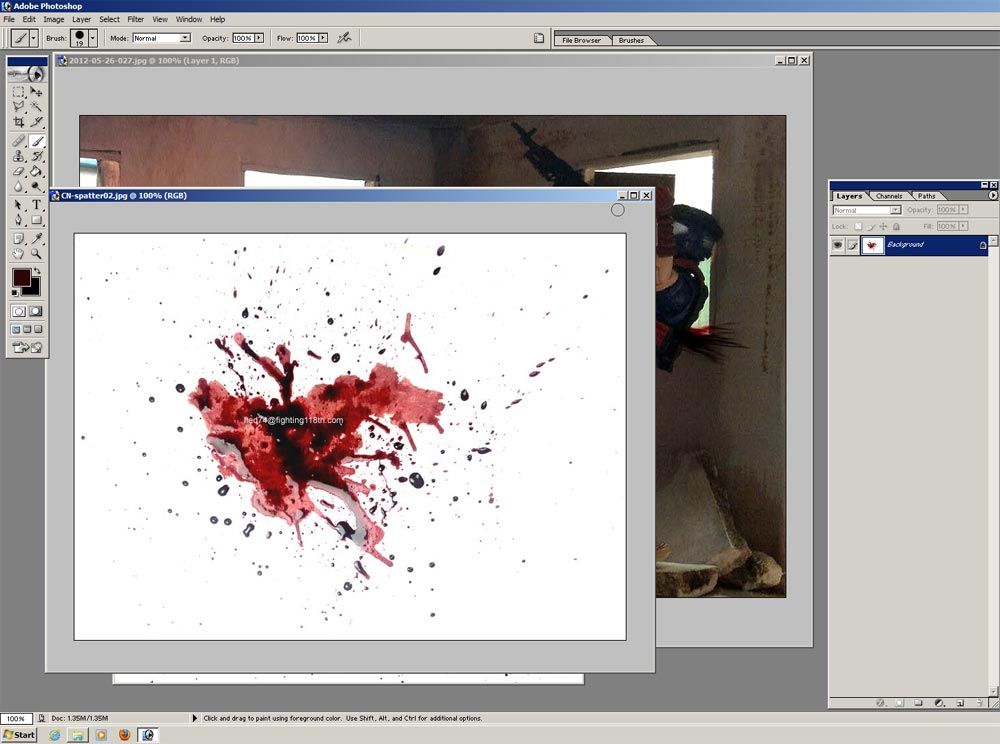
I made my own "blood mix" by blending Halloween fake blood with red and black acrylic paint.
I loaded an old 1/3 inch flat brush with the mix and let it drip onto a sheet of white styrene plastic. I achieved the spatter effect by blowing the large droplets around through a drinking straw, and by raking a toothpick across the brush bristles.
Feel free to use these images, but please don't upload them elsewhere.
Please note that I am no Photoshop guru, and other people may have their own way of doing things. However, I find that these techniques work well for me.
And remember - SAVE OFTEN.
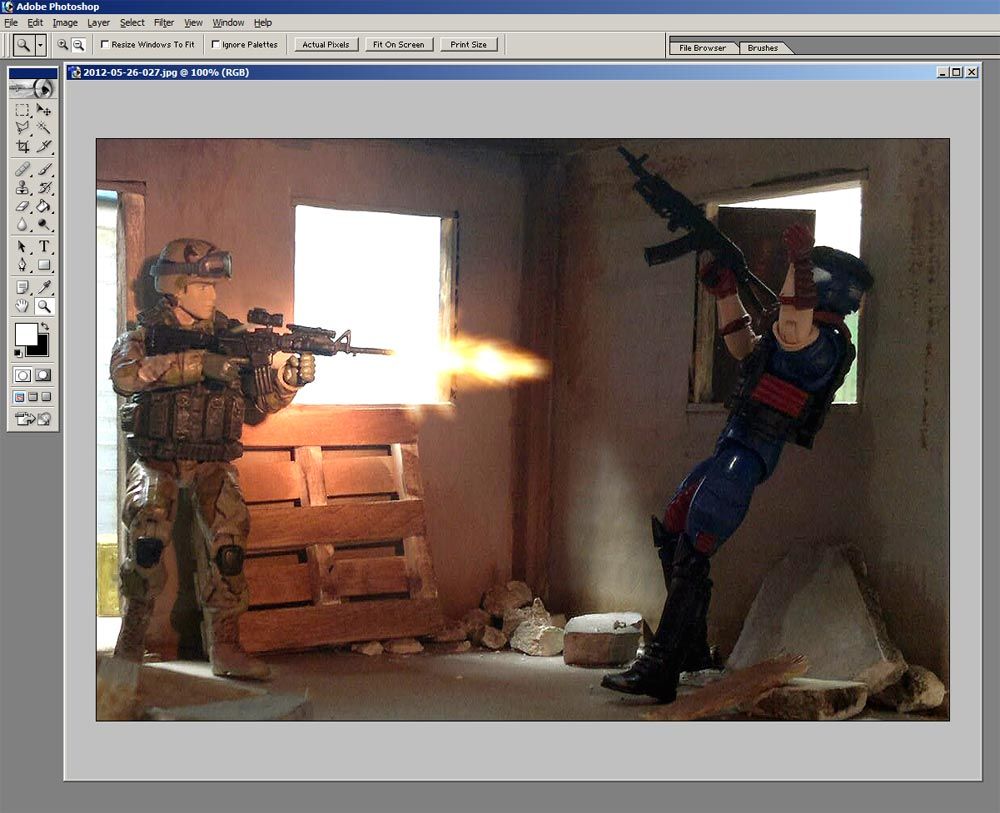
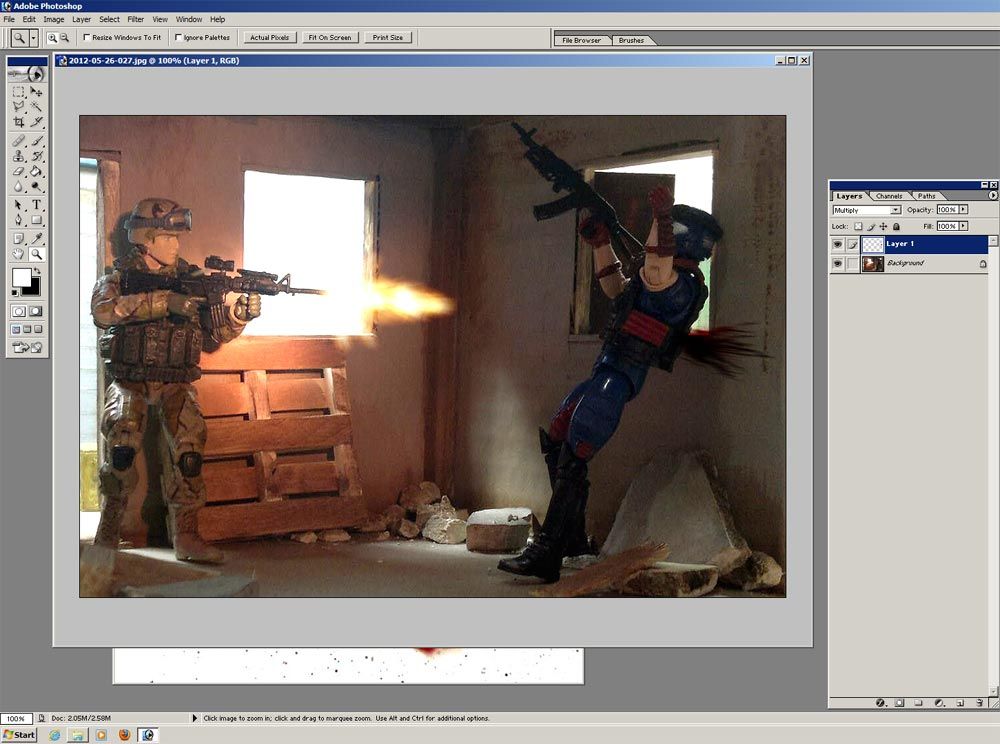
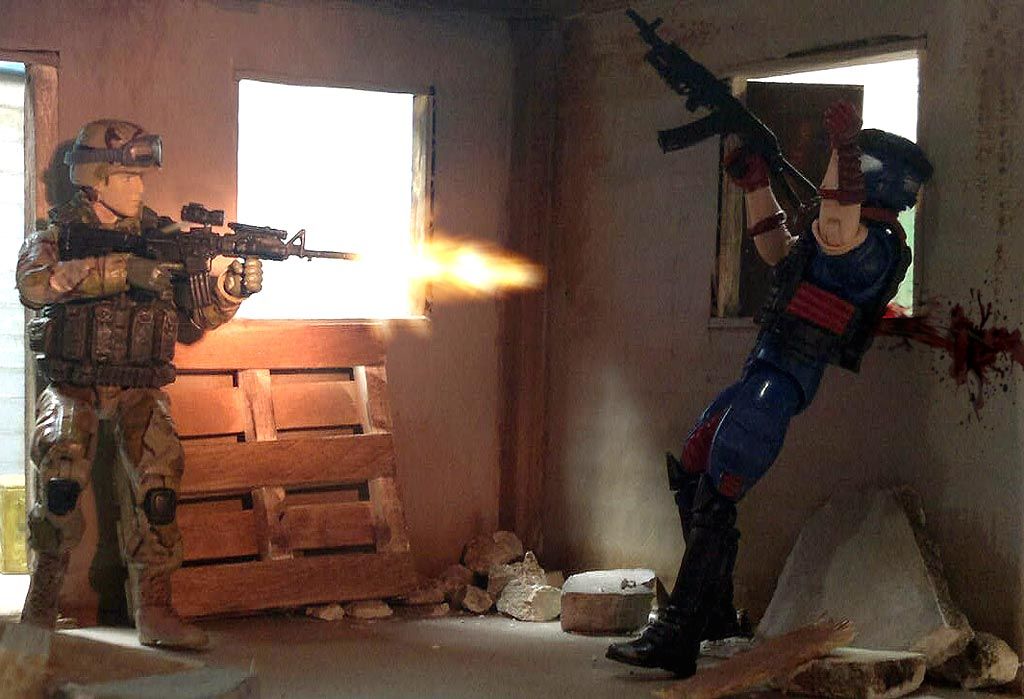
1) I'll start with an image some of you may be familiar with - a similar pic I took was our site banner image a few months ago.
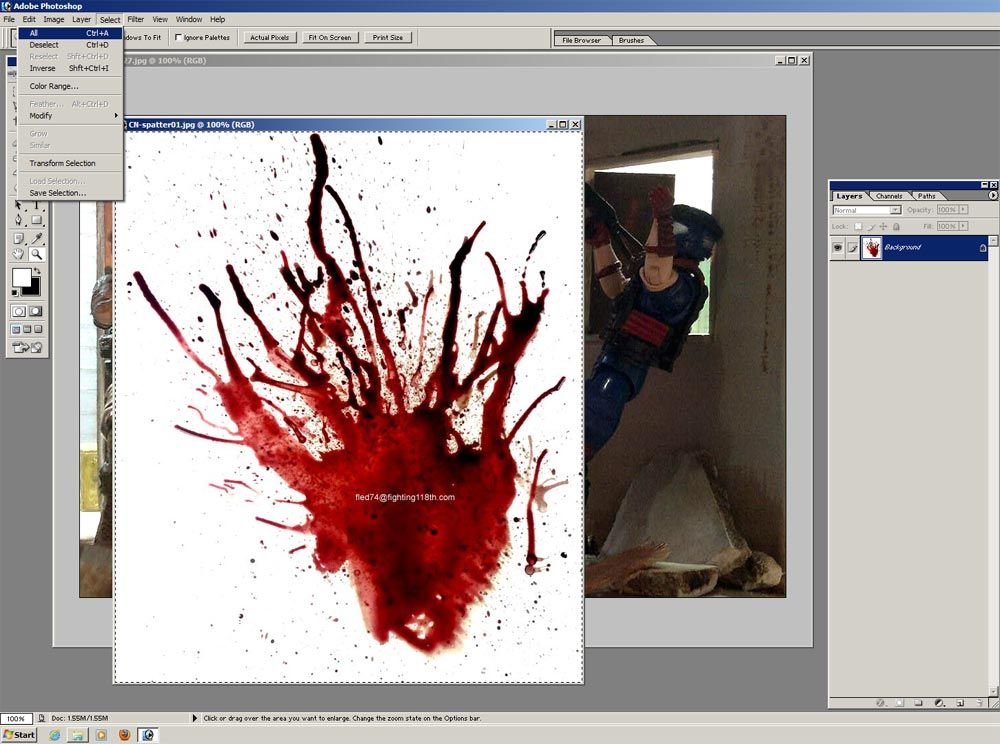
2) Once your image is cropped and resized, open one of the blood pics.
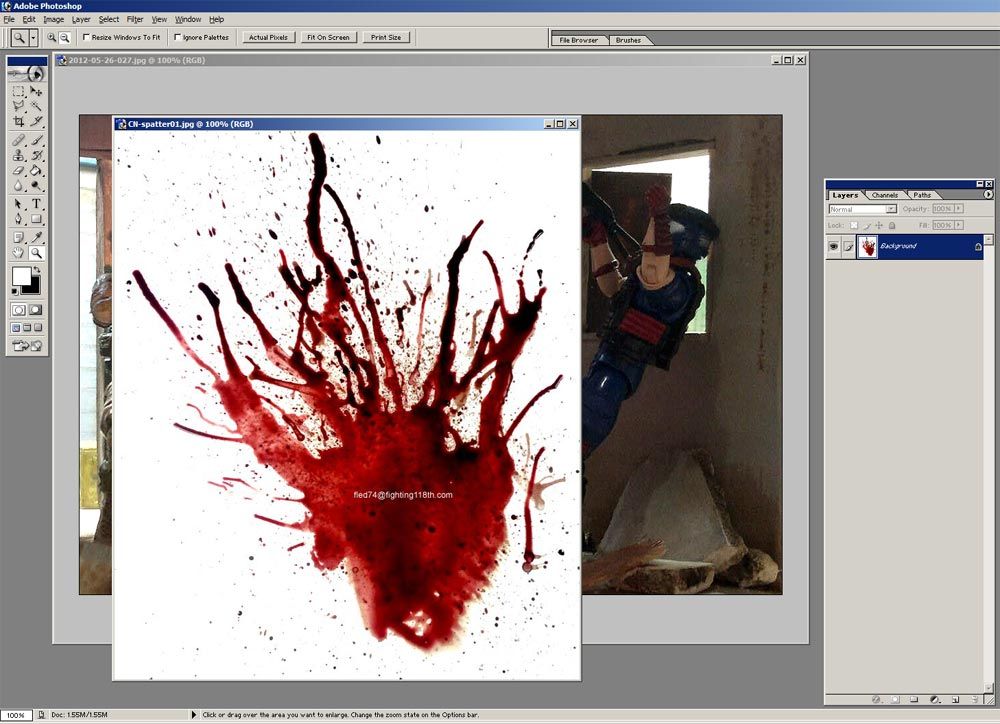
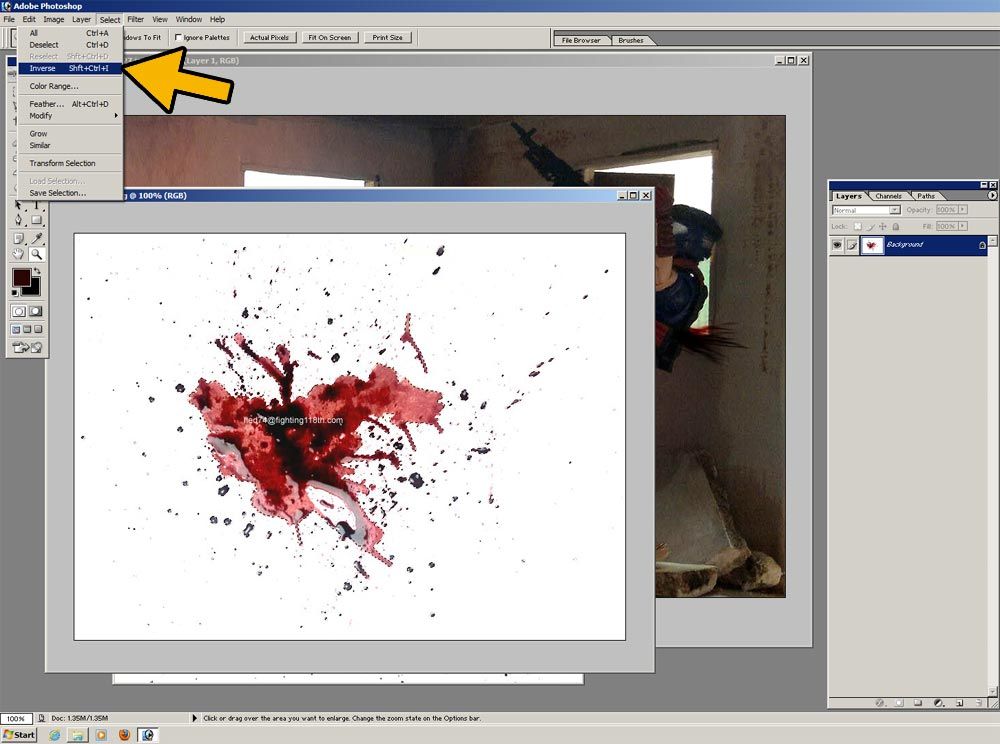
3) With the blood pane active, go to Select>All. This will select the entire image.
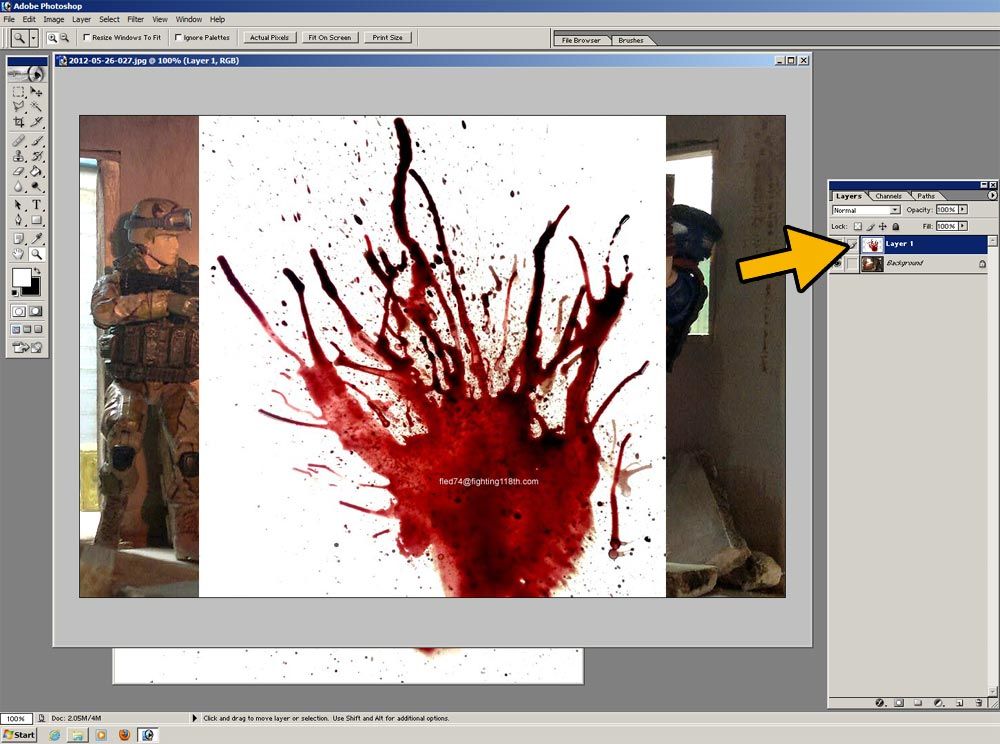
4) Ctrl-C and Ctrl-V to copy and paste it to your image. Note that it is automatically pasted on a new layer.
Hit Ctrl-D to deselect and remove the "marching ants" bounding area.
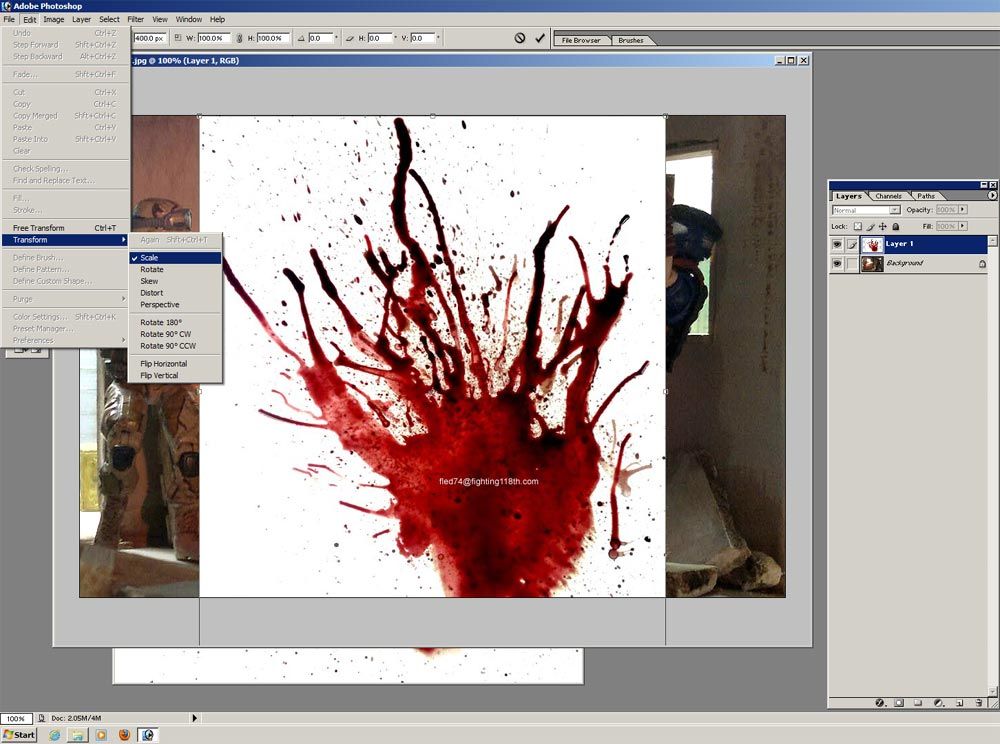
5) Go to Edit>Transform>Scale to resize the layer as desired. Click on a corner of the bounding box and drag to resize. You can hold down Ctrl while dragging to maintain the layer's aspect ratio.
Go to Edit>Transform>Rotate to rotate the layer (thank you, Captain Obvious). Click on a corner of the bounding box and drag to rotate.
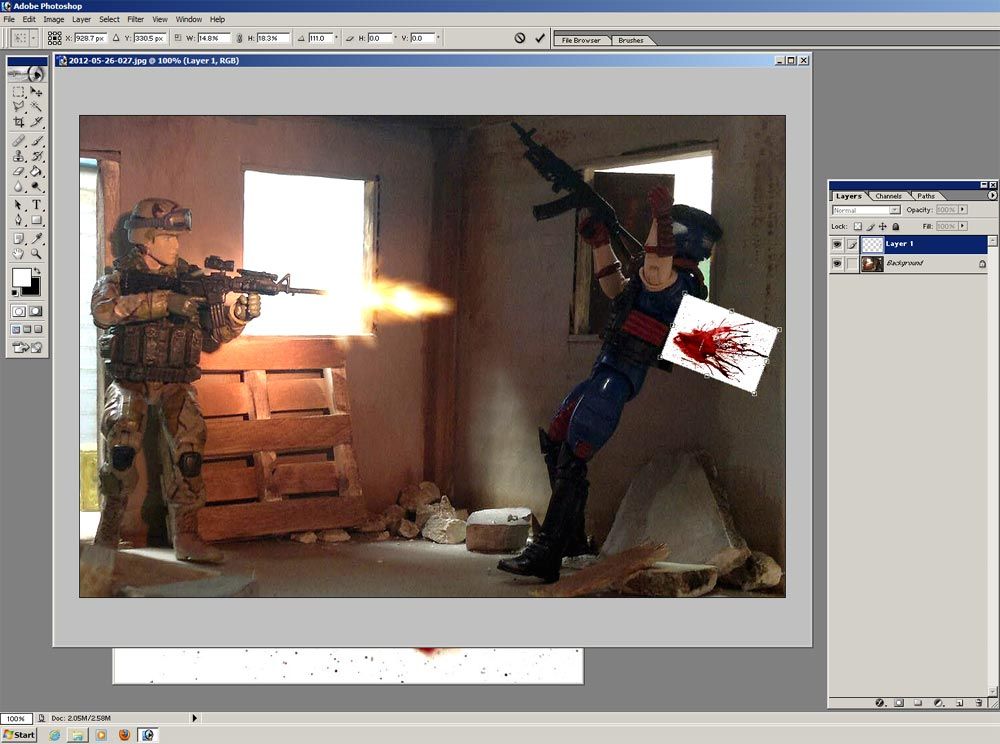
When you're satisfied, click anywhere on the Tools pane on the left to apply the transformation.
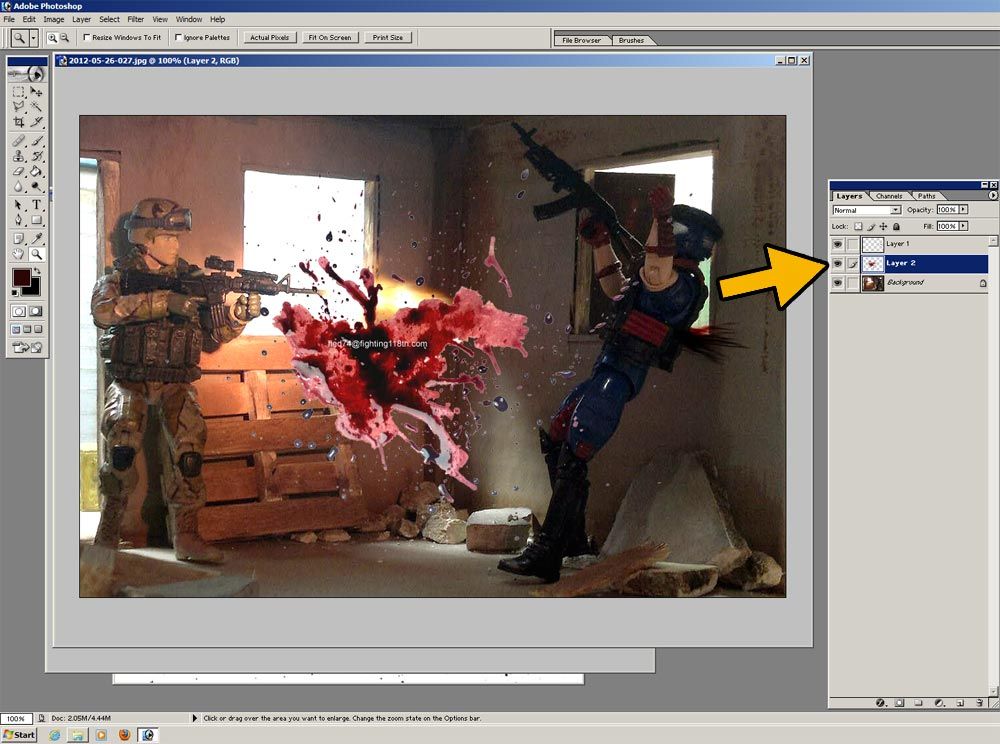
6) You can reposition the active layer by holding Ctrl then clicking-and-dragging to the desired spot.
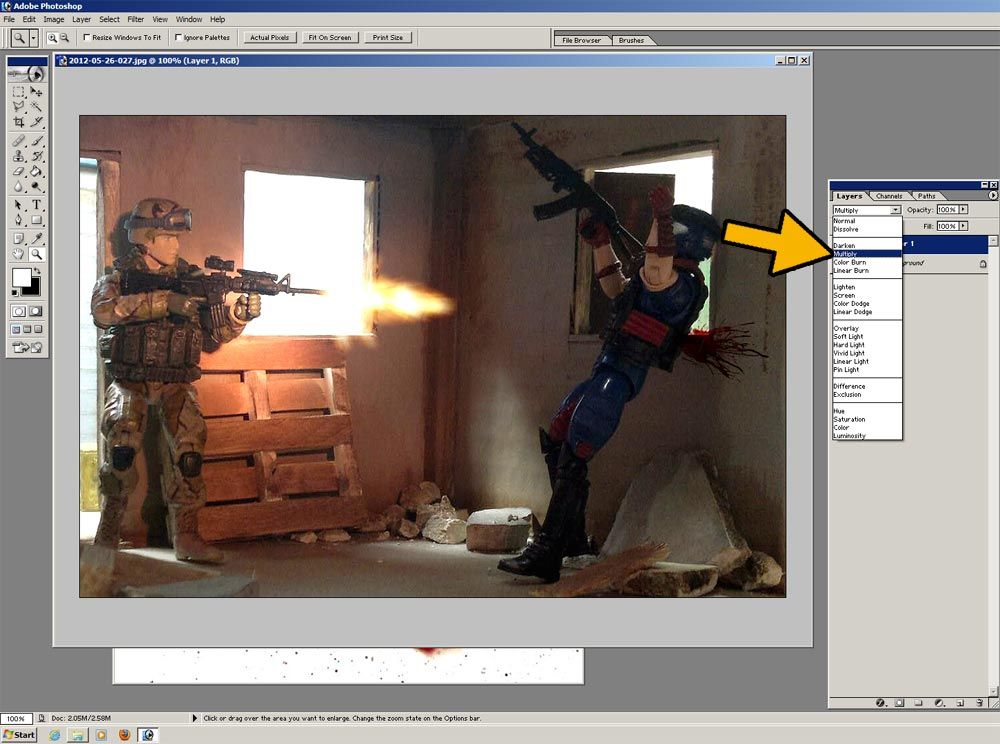
7) Now click on the drop-down menu on the Tools pane - this shows you the various layer blending styles.
Choose "Multiply", which will make all the white parts of the layer turn invisible.
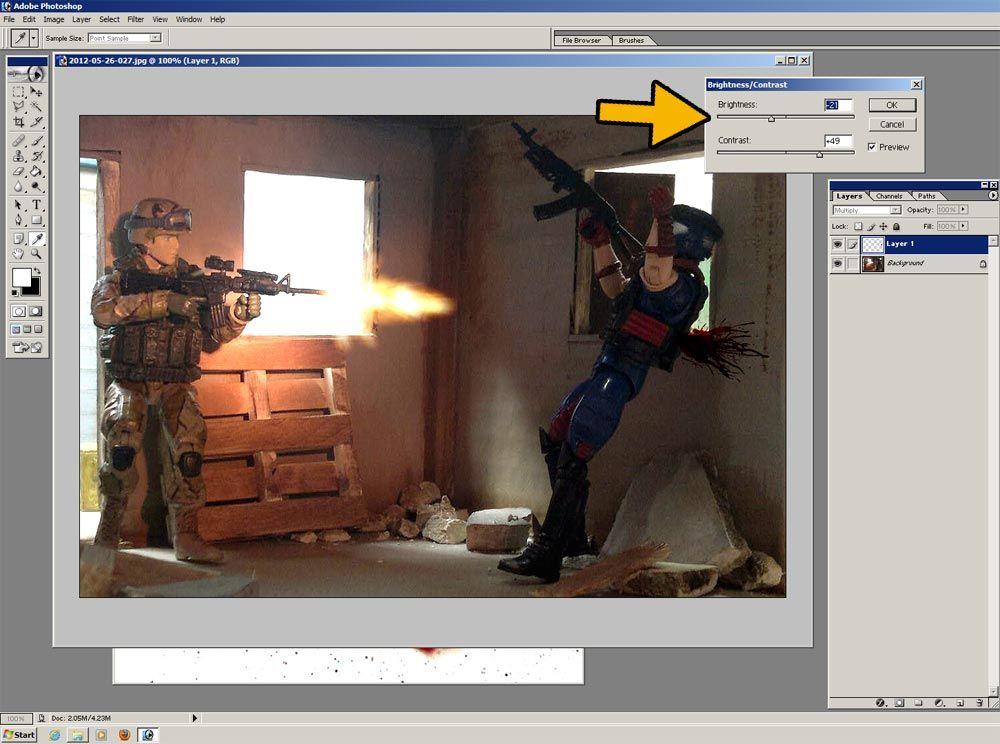
8) With the Blood layer still active, click Image>Adjustments>Brightness and Contrast. This will bring up the Brightess/Contrast window. Adjust the sliders to suit your taste.
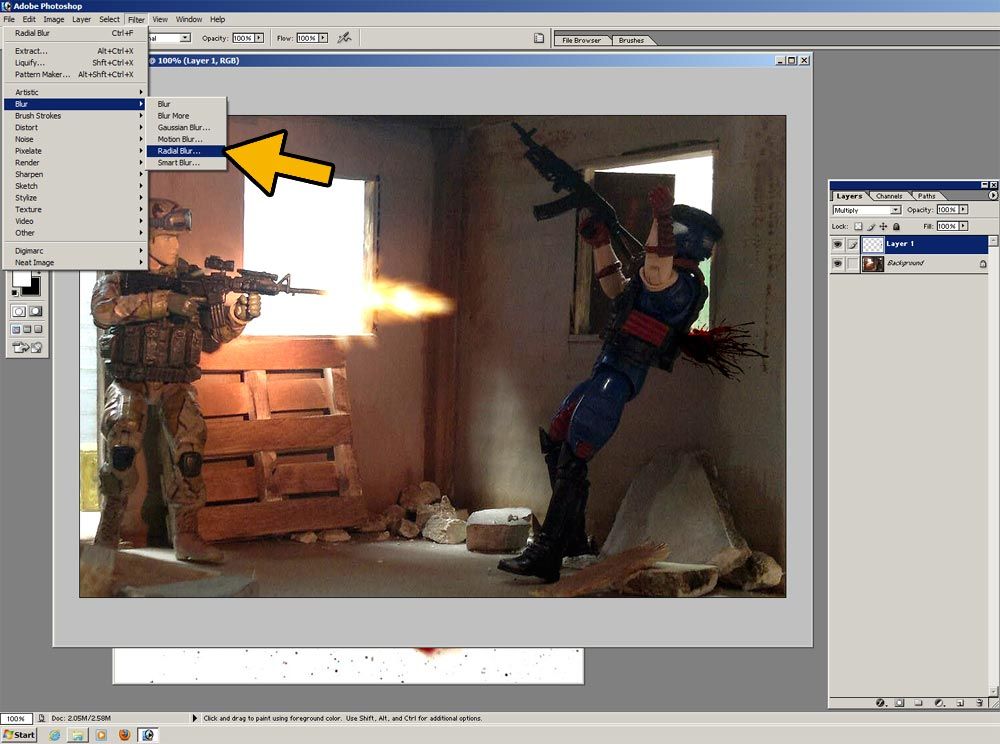
9) Looks OK so far, but we can also add a bit of motion blur to the blood.
Go to Select>Blur>Radial Blur. The Radial Blur window will pop up.
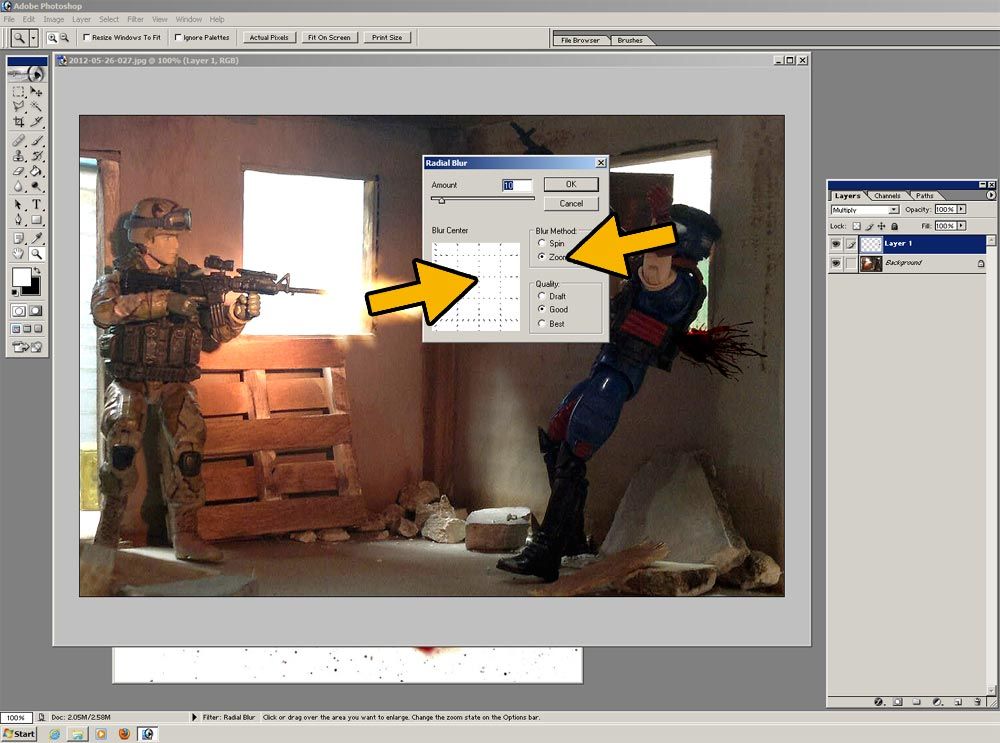
10) Select the "Zoom" blur method, and a blur amount of roughly 10.
The "Blur Center" area allows you to specify where the zoom blur will emanate from. I clicked on an area slightly higher and to the right of the actual center.
11) Click OK to apply the effect. If you're not happy with it, press Ctrl-Z once to Undo, then try again from Step 9 until it looks good to you.
(CONTINUED BELOW)
Anyway, here goes.
Blood has always been a distasteful subject, but during the course of diorama photography and the pursuit of greater realism, we may eventually encounter dio situations where bloodshed is necessary.
Applying actual "blood" (Halloween blood or similar) to your diorama is certainly effective, but not everyone is willing to potentially stain a prized dio piece or figure. Also, blood spray is a very difficult effect to achieve "in camera" at such a small scale.
This is where programs such as Photoshop come in.
There are many websites that offer free downloadable user-made Photoshop brushes (Google will help you find them), but for this tutorial I chose to make my own image overlays instead:
I made my own "blood mix" by blending Halloween fake blood with red and black acrylic paint.
I loaded an old 1/3 inch flat brush with the mix and let it drip onto a sheet of white styrene plastic. I achieved the spatter effect by blowing the large droplets around through a drinking straw, and by raking a toothpick across the brush bristles.
Feel free to use these images, but please don't upload them elsewhere.
Please note that I am no Photoshop guru, and other people may have their own way of doing things. However, I find that these techniques work well for me.
And remember - SAVE OFTEN.
1) I'll start with an image some of you may be familiar with - a similar pic I took was our site banner image a few months ago.
2) Once your image is cropped and resized, open one of the blood pics.
3) With the blood pane active, go to Select>All. This will select the entire image.
4) Ctrl-C and Ctrl-V to copy and paste it to your image. Note that it is automatically pasted on a new layer.
Hit Ctrl-D to deselect and remove the "marching ants" bounding area.
5) Go to Edit>Transform>Scale to resize the layer as desired. Click on a corner of the bounding box and drag to resize. You can hold down Ctrl while dragging to maintain the layer's aspect ratio.
Go to Edit>Transform>Rotate to rotate the layer (thank you, Captain Obvious). Click on a corner of the bounding box and drag to rotate.
When you're satisfied, click anywhere on the Tools pane on the left to apply the transformation.
6) You can reposition the active layer by holding Ctrl then clicking-and-dragging to the desired spot.
7) Now click on the drop-down menu on the Tools pane - this shows you the various layer blending styles.
Choose "Multiply", which will make all the white parts of the layer turn invisible.
8) With the Blood layer still active, click Image>Adjustments>Brightness and Contrast. This will bring up the Brightess/Contrast window. Adjust the sliders to suit your taste.
9) Looks OK so far, but we can also add a bit of motion blur to the blood.
Go to Select>Blur>Radial Blur. The Radial Blur window will pop up.
10) Select the "Zoom" blur method, and a blur amount of roughly 10.
The "Blur Center" area allows you to specify where the zoom blur will emanate from. I clicked on an area slightly higher and to the right of the actual center.
11) Click OK to apply the effect. If you're not happy with it, press Ctrl-Z once to Undo, then try again from Step 9 until it looks good to you.
(CONTINUED BELOW)
Last edited:


")