Tutorial: Creating Dio Walls from Foam

Mandingo Rex

★★★★★
Founder
Mar 14, 2011
14,392
7
38
41
Gone Baby, Gone
INTRO:
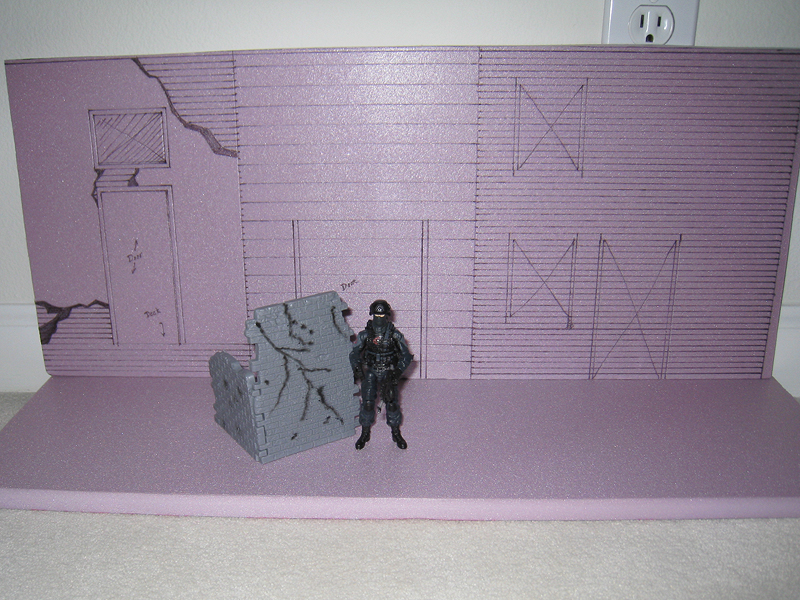
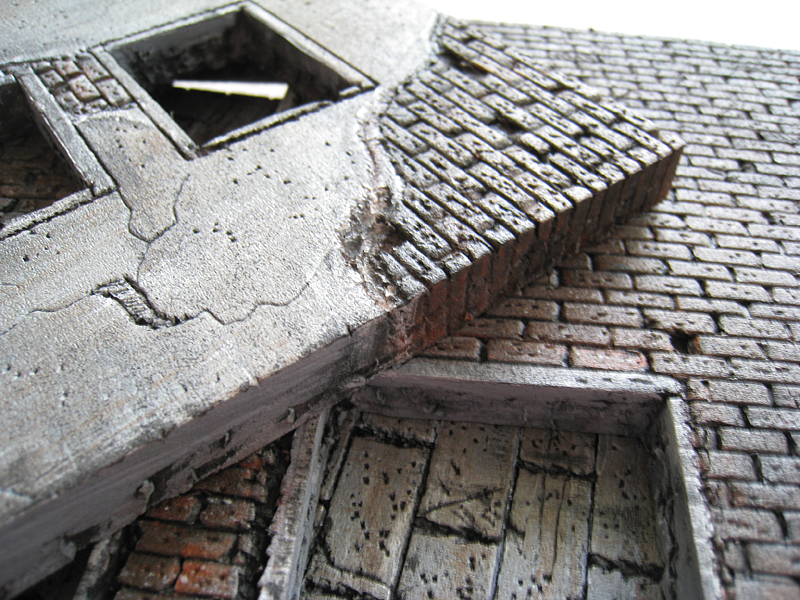
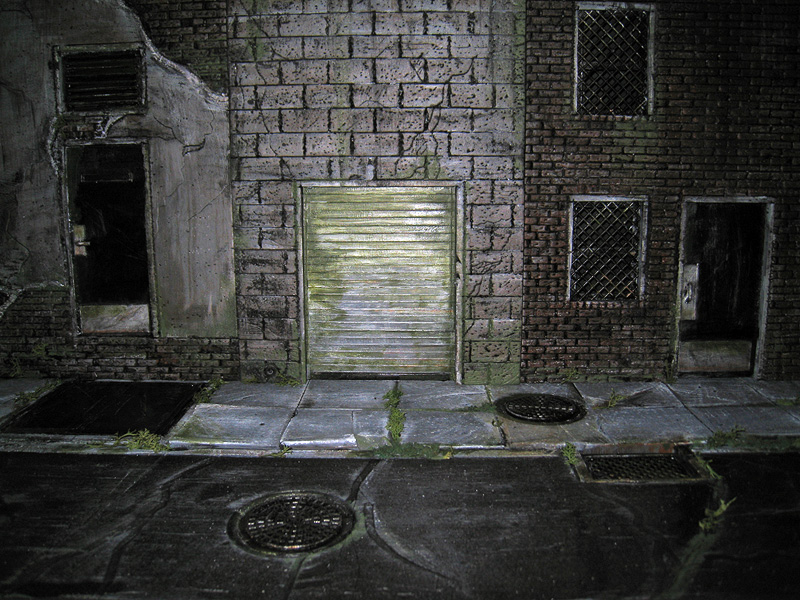
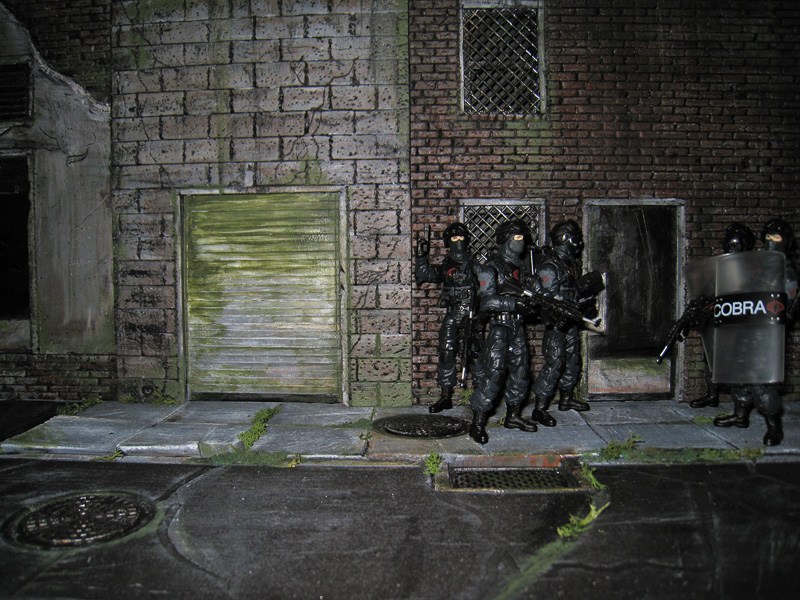
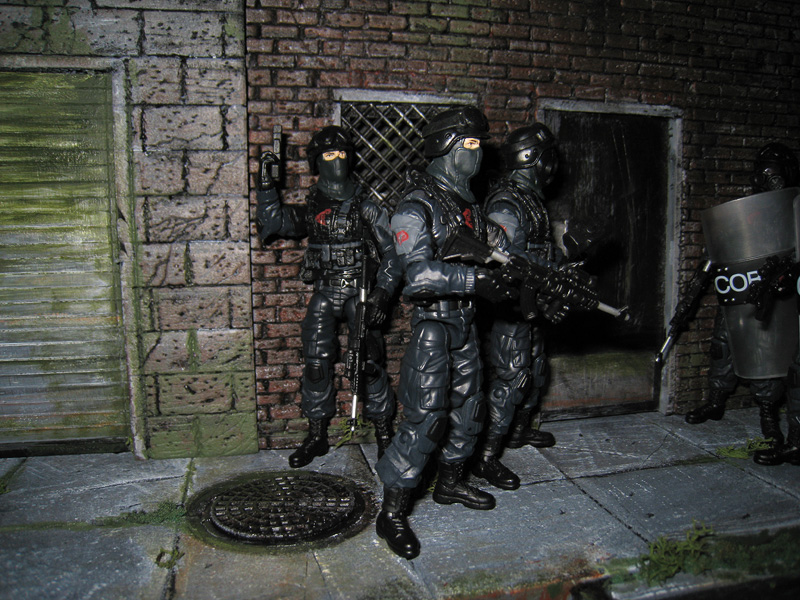
Okay, so this isn't anything new, but something I am trying for the first "real" time in 1:18 scale, with the intent of recreating realistic diorama walls. I have worked with extruded foam before, nearly 10 years ago, in sculpting prototypes in industrial design courses in college, but never for modeling purposes.

In theory, this is the same process, just with different goals. This is the documentation of my process, which hopefully will come in handy to others.

WHAT IS IT?
Extruded foam can be found in various colors, and in different sizes and locations. Unless you're in the Bay Area like me (which has mild climates and doesn't always carry this special "cold weather" insulation material, as I've found out in a more-difficult-than-it-should-be hunt for it), you should be able to find it in most Home Depots or hardware stores, in the lumber and insulation section (at least in most areas of the country).

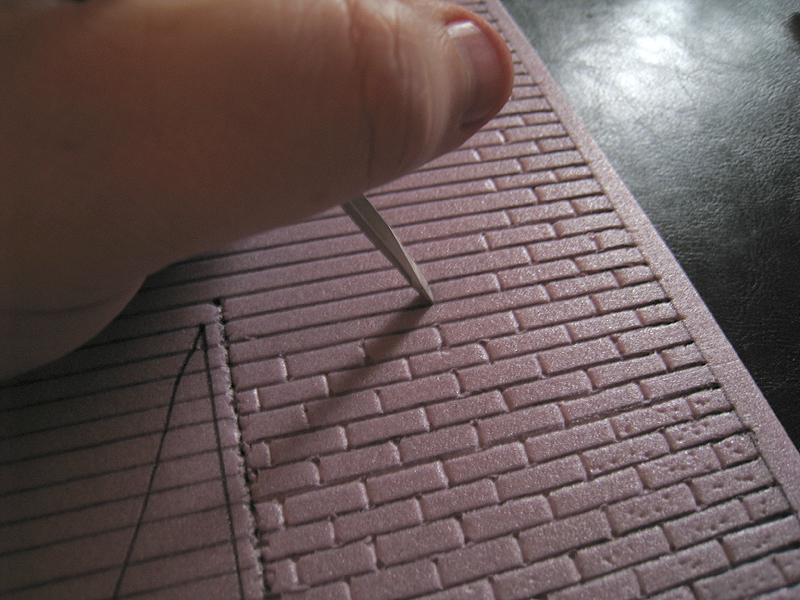
Dow makes a blue foam, and Owens Corning makes a pink foam (which when discolored with age, it can appear more lilac) but they're essentially the same thing and can be interchangeable for this task. Do not use the white stuff that is typically in packing material (like TV boxes, etc.) because it's made from beads and will not look that great. It has a very fine grain, and carves fairly easily.

» DOW'S BLUE FOAM

» OWENS CORNING'S PINK FOAM

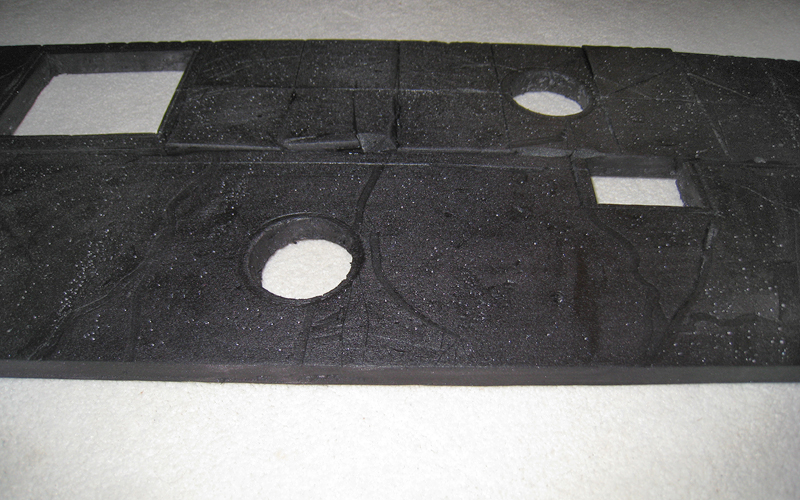
I got a sheet of the pink stuff at Home Depot for roughly $15. It was 8 feet by 4 feet and .5" thick, and I had to cut it down myself to get it home in my car (due to difficult employees not willing to cut it for me) but you should be able to ask them to cut it down for you. I have had this done before in the past, but sometimes they can be difficult about it. A boxcutter should do the trick, but it's nice to get straight edges. It comes in .5 inches to 2" thick at the store I checked, and the thicker stuff would be great for making cliffs and mountain terrain. Maybe more on that later?

WHAT ELSE WILL I NEED?
There are probably endless tools and things you can use to to create textures, and to carve the foam, but here are some basics I imagine you'll need. I'll add to the list and clean up as I go.

• A PLAN (or some rough idea of what you're going to build... not necessary but a strong suggestion)
• BOX CUTTER (for heavier cutting and shaping)
• XACTOs w/replacement blades (for lighter cutting and details)
• STRAIGHT EDGE/MEASURING TOOL (ruler, t-square, block of wood... so long as it's straight)
• DREMEL TOOL (not critical, but the damn thing comes in so handy, why not?)
• GLUE (I'm going with Gorilla or wood glue, but stay tuned...)
• CARVING TOOLS (sharp stuff, blunt edges, gougy things, scratchy things... full list TBD)
• TEXTURING TOOLS (Stuff to create textures with...TBD...this will be fixed down the road)
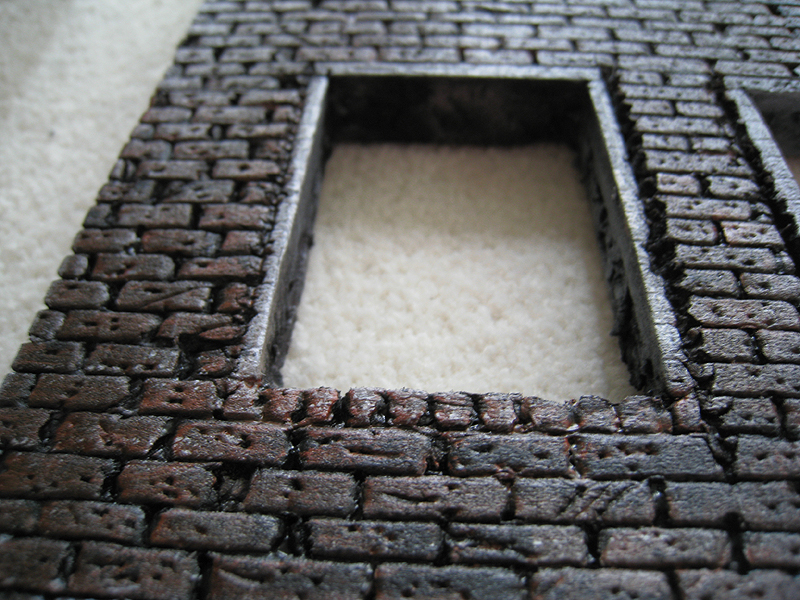
• WOODBURNING TOOL (more details to come)
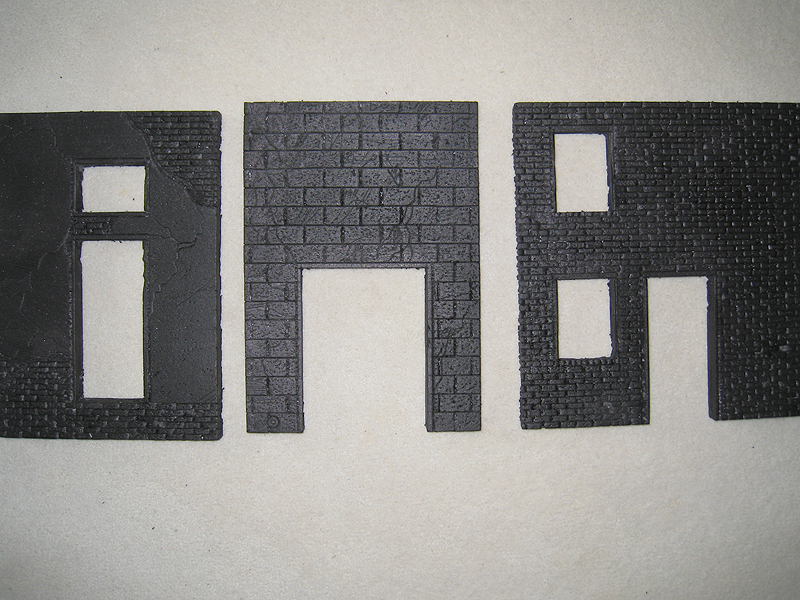
• PAINT (acrylic, water-based... enamels and spray paints are a no-no and will melt the foam!)
• CUTTING SURFACE, GOOD LIGHTING, GOOD VENTILATION! (be safe and responsible)
• FIRST AID KIT or BANDAIDS AND (see above)
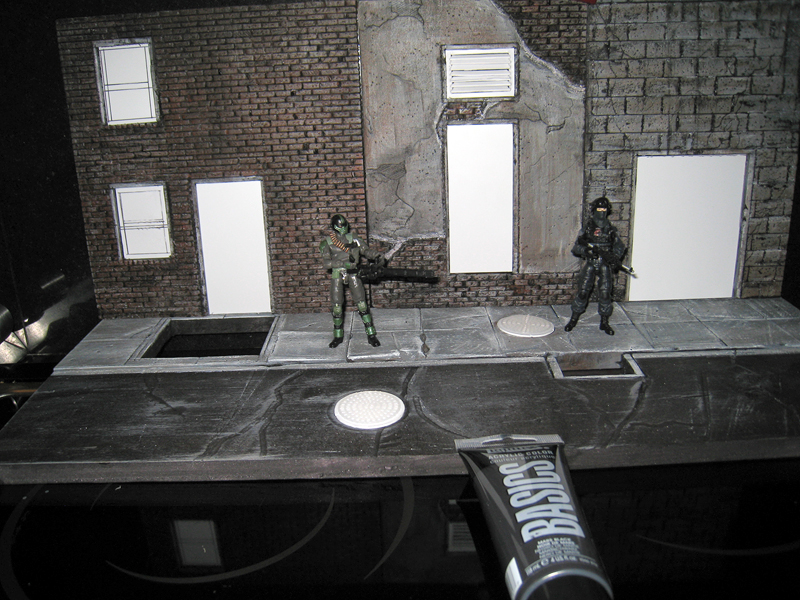
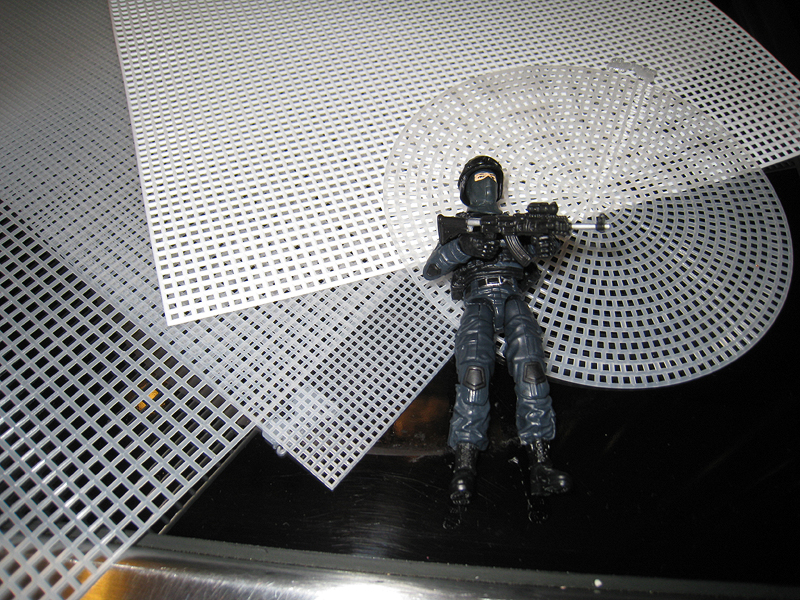
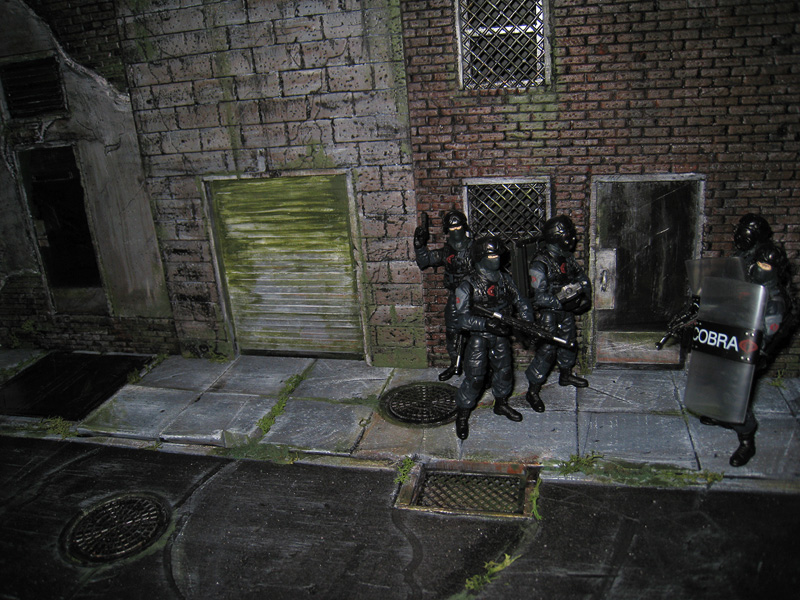
• 1/18 SCALE FIGURE or something to use as a "constant" or reminder of what you're building for, and to make sure it fits and doesn't look out of scale

Bored with waiting on me to finish? Below are some excellent resource links:

» Amazing Detail Tutorial with samples and lots of pics

» Some helpful tips and tricks

» Great Foam Cutting Tutorial using heat tools (Video)

» Really Well-Done Garage Diorama

» Great Tutorial showing railroads and terrain created with sprayed expanding foam

***I'll be adding to this list... feel free to add your own links to boot)***
 
Last edited:

Mandingo Rex

★★★★★
Founder
Mar 14, 2011
14,392
7
38
41
Gone Baby, Gone
GETTING STARTED:

Now that you've got your materials, and hopefully some sort of idea in your head of where you want to start, it's time to dive in.

I cut down my larger boards into roughly 24" x 10" boards, so now I have some strips that are easier to manage. For my first wall section, I squared up 2 adjoining sides so that a T-square can work accurately off the 90º angles. I left the other end a bit rougher as I'm going to be cutting it off clean once the detail work is done and it's time to knock out the window holes. So with one perfectly square corner and 2 sides that are at 90º to each other, I use that as my origin and begin marking off the 3 buildings that I'm going to use for this tutorial.

I divided the larger wall into 3 smaller, unequal sections that will become the separate building façades. For building 1, I'm doing a concrete/stucco type wall with underlying brick showing through broken-off places. The center building will be a cinder-block construction wall, and the third building will be typical brick. I marked off places for doors and windows that I will later cut out and fill in with styrene doors and windows (to be shown in a separate section). Individual brick rows were measured off at every third tick on my T-square, which I believe is roughly 3/32" per brick. I matched it roughly to the PTE dio walls, but you can make your bricks whatever scale suits your needs. Below you will see the finished markups made with a sharpie and 2-foot T-square and 2-foot metal ruler. It's not perfect, but it'll do for a rough draft that I'll carve into in the next step.

As far as door and window dimensions, I wasn't very strict as far as building standards, so I guesstimated the door heights at 4.25-4.5", and used a modern GI Joe figure as a stand-in for a 6' man to make sure that it looked close enough. You can be stricter in your standards if you want, but for the time being, I'm working a bit looser to keep things simpler.


Last edited:

Mandingo Rex

★★★★★
Founder
Mar 14, 2011
14,392
7
38
41
Gone Baby, Gone
TEXTURING & CARVING:

Once I got the basic walls traced out roughly how I wanted them with the penned-in guide lines, I took to actually carving things out a bit more. (I plan on later doing "ruin" or "battle damaged" walls using the woodburning tool for deeper cuts and smoother carving, but for now, basic tools worked well enough.)

I started on the brick walls first, and below are some photos showing the basic steps I took. I
used a cheap plastic needlepoint "needle" (shown below) to retrace the horizontal mortar lines between the brick rows (I also found some other great uses for needle point plastic grids, to be shown later used as mesh grills, fences and even manhole covers!). I used a metal straight-edge to guide the lines, and dug in deep enough to give a good recession that will take paint later on and still retain good depth.

After doing all the horizontal lines and tracing around the doors/windows/grills, I decided to do the vertical lines. As a word of caution, this apparently goes perpendicular to the "grain" of the foam that I was using, and tends to tear somewhat if you're not careful. This will not be a problem if you are doing damaged or worn buildings (like mine) but just a word of caution, as I wasn't exactly expecting the foam to have a "grain".

To get around this, I actually used a small flathead screwdiver to "punch" in the vertical mortar lines in the brick to prevent the tearing from dragging the plastic needle the wrong way agains the grain. I freehanded these lines, but if you want to be more precise you can measure it. I also used the screwdriver to create scratches and small pitted areas, and to gouge out some areas for worn-away damage.

I repeated this on a larger scale for the "cinder block" façade and for the "worn away" concrete wall that shows the brick underlying layer. For the cracks, I just freehanded them in.

Once all the mortar lines were carved, I went in and cut apart the individual buildings and then cut out the door and window and vent openings. You can see a Cobra Shock Trooper for scale reference below to get a sense of scale for the doorways and bricks, etc.


Last edited:

Mandingo Rex

★★★★★
Founder
Mar 14, 2011
14,392
7
38
41
Gone Baby, Gone
PAINTING AND WEATHERING:

Once the carving was done, I did a quick sweep over all the walls with a large paintbrush just to make sure all the loose foam bits were knocked off. I then took some black acrylic paint that I got at Michaels ("Basics" acrylic paint, found in a large tube. I usually use Tamiya paints for my custom figures, but for this application, the cheap craft stuff goes far and works great for the larger area purposes).

I covered the entire wall sections with a good black base coat, using cheap foam brushes found at Michaels. If you miss some areas and don't get a completely solid black coat, it's fine as long as some black gets on the pink foam, because it ends up looking sort of brickish anyways. With blue foam, you'd probably want more solid coverage. I added a bit of water because you want to get the black into all the deep crevices and cracks without any foam showing.

I let all 3 walls dry overnight and started fresh in the morning on the color coats, and although waiting that long isn't necessary, I would suggest waiting until the base coat dries completely. The foam retains water a tad longer than plastic, canvas or wood, so drying time tended to last longer than normal. Once it was dry though, it wasn't tacky or anything, and ready for the detail paint.

I started with the brick, and took a good "brick" or rust-colored paint (all paints used for the larger areas were "Basics" Acrylic paints, easily available at Michaels) and poured it out evenly onto a plastic container, and got a good clean covering on the foam brush. I think dragged the brush with the grain and against the grain of the brick pattern, but not pushing too much color into the crevices and cracks. By doing this, the black "mortar" lines and cracks and dents kept their black color and gave some good depth. I repeated this process with the concrete and cinder block wall sections as well, with the only difference being that I mixed a custom gray from black and white (I only used 4 colors for the walls: black, white, brick and brown, but I did mix them for different washes).

There really isn't a process for the steps between the black base coat and when I finished, as each person will probably want to add their own level of detail to their own satisfaction. Also, I forgot to document these with photos, as I got caught up in the painting. But really, the detail work is really up to the individual artist. I'm sure I'll revisit these walls down the road, as they can be repainted for different uses.

Some techniques that I used were as follows:

• Wet brushing: I got really swampy water/paint mixtures to create water damaged areas and for runs. You can brush on and let gravity do the work for you, and have realistic water drips, or brush them on yourself.

• Dry brushing: I drybrushed a lot of the white highlights on the bricks. I would follow the top edges of the bricks and go across the row, and then go back with a dry foam brush and drag with the grain, or against, depending on how I wanted the effect to be for different wall sections.

• Stippling: Simply getting a little paint on a dry brush and dabbing instead of brushing. I did this mostly on the bricks with white and black, and worked my way across, letting the different coats dry before doing the next. It really helped to add some very fine details, that you can hopefully see in the photos below.

Black base coat:


And the finished walls:


Last edited:

Mandingo Rex

★★★★★
Founder
Mar 14, 2011
14,392
7
38
41
Gone Baby, Gone
SIDEWALK, WINDOWS, DOORS, FIXTURES, ETC. (The details)

To properly view the exterior as a street setting, I felt that the buildings needed a sidewalk. So I made a half-street (one lane only... this can be added to later) with a sidewalk. I repeated the basic drawing, carving and base-coat painting mentioned previously to create the sidewalk, so I won't go into details because it was done in the same fashion.

The minor differences that are in the street that weren't in the wall steps are as follows: I gridded out the sidewalk and cut a few slabs out and re-glued them to create uneven sidewalk segments, and I raised the sidewalk slightly to give it a curb. Otherwise, the grills and manhole covers, dents and cracks were created using the same techniques.

(More to come as I paint the concrete and details).


Below are some needlepoint frames that I bought at a local craft store. I felt that the different scales would come in handy for varying metal grills, fences, etc. I plan on eventually using the circular one for a drain and manhole cover (the manhole cover will be shown in this tutorial) and the square grids will be used to create metal grating for the sewer drain and windows.


I found that the 1/16" styrene is a bit too thick for cutting out windows, but they're probably a good weight for any load-bearing items or things that will be moved more often, like doors or manhole covers. The problem lies in cutting out the interior bits from frames. You can cut them into strips and reassemble, but I preferred the solid, single-piece frames with the knocked out center for the sturdiness. This will take some careful cutting, as the 1/16" is fairly thick (and why I recommended going thinner, which will cut your time in half).

To cut styrene, all you need to do is score or cut it about halfway, then you can snap it and it will break pretty cleanly. You may need to do a little cleanup along the edges, but it should be straight. For circular items like the manhole covers, I simply used stronger scissors and hand-cut the circles that I drew onto the styrene. Below are the doors and windows and vents laid out, completed and ready for painting:


And here is everything all assembled, with some foliage and green "mold" weathering added...


I will eventually make drain pipes and add lights over the doors, and glass to the windows (and show them with the security grills removed). But more or less, this is wrapped up. I'm considering doing a separate tutorial for the small bits and details like the pipes, etc. As for the walls, I will make 2 more longer brick sections and another alleyway/sidewalk section of concrete so that I can have a good set of walls to reassemble for various photos.

More photos are in the next post below (2 posts down). Hope you enjoyed it!
 
Last edited:

G.I.*EDDIE

gobbles a LOT of cock
Founder
Mar 14, 2011
43,432
428
83
S.E. Mich :(
Matt, you a-hole...i read thru all that BEFORE checking on the pics...of nothing...WTH?!...no progress! :D

well, at least bigdaddy came thru with a hilarious first post
 

G.I.*EDDIE

gobbles a LOT of cock
Founder
Mar 14, 2011
43,432
428
83
S.E. Mich :(
i've always wanted to see an alley...or like a whole length of a city block...not really a whole block, but you know, the facades of a few buildings...

the interior of an abandoned warehouse seems like it'd be usefull too...some "I" beams and such...maybe a hole in the floor/wall...epoxy puddle(s)
 

Mandingo Rex

★★★★★
Founder
Mar 14, 2011
14,392
7
38
41
Gone Baby, Gone
i've always wanted to see an alley...or like a whole length of a city block...not really a whole block, but you know, the facades of a few buildings...

the interior of an abandoned warehouse seems like it'd be usefull too...some "I" beams and such...maybe a hole in the floor/wall...epoxy puddle(s)

Maybe that could work... Making a few consecutive buildings made of different construction. Plus, it'd give me some variety to try out textures for the tutorial. I could do cinder-block, regular brick, and even a damaged façade with brick that's boarded up or something. That'd give me a chance to also stagger the buildings a little bit and do some variety of doors. Maybe even a dock?

Good call. I'm going to use styrene sheets to make the doors and windows, and I picked up some awesome needlepoint plastic framework that I plan on using for grills and manhole covers. I'm actually really excited about getting started on this now.
 

G.I.*EDDIE

gobbles a LOT of cock
Founder
Mar 14, 2011
43,432
428
83
S.E. Mich :(
if you make the buildings seperate (at least two of them) you could move them apart and closer for alley scenes if need be...

WTH do you gotta live so far away...this would be fun to work on...
 

G.I.*EDDIE

gobbles a LOT of cock
Founder
Mar 14, 2011
43,432
428
83
S.E. Mich :(
keeping them seperate could work well for a few reasons really...you could switch them around and repaint for a new look...or turn one sideways for a corner thing...

Ricks had great success with roof shingles for streets...and floor tiles for sidewalks...and cobble stone for the tiles made up of tiny tiles...plus he takes them apart and they are perfectly scaled to look like bricks
 

Mandingo Rex

★★★★★
Founder
Mar 14, 2011
14,392
7
38
41
Gone Baby, Gone
Yeah, I may make the individual buildings "modular" to some degree. But I also plan on making several wall sections that can all be interchanged to make new streets, so before long, I will have a good selection of bits to swap out for shots.

Eventually, I'd like to make a dock, sewer/tunnel, warehouse, rooftop, and Cobra temple/throne room. Those are my immediate goals. I'm sure over time, I'll have quite a library of walls and textures to assemble for dios.
 

G.I.*EDDIE

gobbles a LOT of cock
Founder
Mar 14, 2011
43,432
428
83
S.E. Mich :(
OOOooo, the sewer/tunnel sounds cool...as does the roof top...hadn't thought of those...

i'm sure Rick will be really interested to see how this comes along
 

Mandingo Rex

★★★★★
Founder
Mar 14, 2011
14,392
7
38
41
Gone Baby, Gone
K, Eddie, I started throwing in some WIP shots. I only had time last night to draw up the main guidelines on the first wall section. I am doing 3 buildings, each with different construction material and different doors. I think for the first building, I'll add in a loading dock or something like that to reach the different door height.
 

G.I.*EDDIE

gobbles a LOT of cock
Founder
Mar 14, 2011
43,432
428
83
S.E. Mich :(
looks good so far...maybe take your pics with a figure for reference?...

how is the foam board?...foam on one side, paper on the other?...or simply just foam?

also, if you can find them, working your stuff and the Tech Deck stuff together would be really cool and save some time/labor...not sure if thats what you menat by "loading dock"
 

MAJOR BLOOD

Size matters
Staff member
Mar 13, 2011
13,592
8
38
Tech deck has some smaller things to use as add ons too. I got a loading ramp for the warehouse SIC DETH made me. They had guard rails, fire hydrants and other things along with picnic tables too. I think they are around $10 and you can always just pawn the skateboard off in e bay for a couple bucks.
 

Mandingo Rex

★★★★★
Founder
Mar 14, 2011
14,392
7
38
41
Gone Baby, Gone
looks good so far...maybe take your pics with a figure for reference?...

how is the foam board?...foam on one side, paper on the other?...or simply just foam?

also, if you can find them, working your stuff and the Tech Deck stuff together would be really cool and save some time/labor...not sure if thats what you menat by "loading dock"

The pink foam is just foam on both sides. No need to tear paper off. it's 1/2" thick, although it comes with a protective clear plastic sheeting that you need to tear off, but it comes off without leaving residue, and isn't supposed to be used with it in the first place, I don't think.

And I will have a figure for reference in the official shots, these are just working bullshit photos because I'm too lazy to upload the few pics as I go along because it's a slight pain in the ass with my camera.

As for the Tech Deck stuff, that's exactly what I'm hoping to use it for. Next time I swing by Target, I'll scour the section for stuff like ramps, docks, and little accessories like fire hydrants. Those were things I was actually trying to figure out how I'd do them anyway, so that will save me some time.

i just checked out that link for the first time...

wow...that guy is bada$$!

That guy's work will make me look simply retarded when I'm done. His tutorial may be more useful than mine, but I wanted to sort of do this for myself as well, as I went along.
 

G.I.*EDDIE

gobbles a LOT of cock
Founder
Mar 14, 2011
43,432
428
83
S.E. Mich :(
yeah, i would prefer to see a beginners tutorial anyway and follow along with someone who would basically be in the same place skill wise as myself...that guys a pro apparently...hes no good to a pre-schooler like me
 

MAJOR BLOOD

Size matters
Staff member
Mar 13, 2011
13,592
8
38
We gotta' get SIC DETH to share some of his secrets too. He needs to teach us the jedi ways of foam.
 

G.I.*EDDIE

gobbles a LOT of cock
Founder
Mar 14, 2011
43,432
428
83
S.E. Mich :(
some SIC DETH tips of what to do and what NOT to do would certainly be nice...save some trial and error headaches
 

snakeling

not an actual member
Mar 15, 2011
932
0
0
48
No SD? I never even knew he did that till MB got one from him. Something tells me he is keepin' that to himself. And on the one hand...... I can't blame him.
 

Mandingo Rex

★★★★★
Founder
Mar 14, 2011
14,392
7
38
41
Gone Baby, Gone
I mean, I've been busy and all this week so I haven't had time to pick back up on this like I wanted, but if SD wants to, he can do the tutorial instead.

*shrugs*

OMG that link is amazing.. I.. I.. I think I'll pay someone to make buildings for me, I can't fathom doing all that.

Yeah, that dude's work is outstanding. I can't imagine the hours put into it.
 

G.I.*EDDIE

gobbles a LOT of cock
Founder
Mar 14, 2011
43,432
428
83
S.E. Mich :(
I mean, I've been busy and all this week so I haven't had time to pick back up on this like I wanted, but if SD wants to, he can do the tutorial instead.

oh no no no...i was really looking forward to seeing this from a newb point of view...i was just hoping that SD could save you, and indirectly all the viewers, some headaches by listing some parels and pitfalls, things to avoid, definate don'ts...and maybe some tips along the way...but really, seeing someone whos completely new to this, with the same level of skill set take this on is what i want to see...
 

Mandingo Rex

★★★★★
Founder
Mar 14, 2011
14,392
7
38
41
Gone Baby, Gone
Well I'll still be making mine and documenting it, but I can't promise anything from it. I'm hoping to have some time tomorrow to at least carve out and get some paint on at least a segment. I've gotten 2 Tech Deck stair sets too, which will be fun to add to the mix.

I'm still looking for that damn loading dock that Blood had, but I may have to order it online. It's killer.
 

snakeling

not an actual member
Mar 15, 2011
932
0
0
48
SD built that dock, buy one from him. No company makes buildings like that; I have wasted many hours on the internet looking for 1:18 scale buildings. I'm looking forward to anything MR and SD have to share here.
 

MAJOR BLOOD

Size matters
Staff member
Mar 13, 2011
13,592
8
38
Like snakeling said, REX. SD made that bad boy. The man can turn coal into a diamond with the touch of his hand. He has a very creative eye for that stuff. He has another project in the works for me right now. I don't know what but what I do know is it will be off the hook.

Sometimes you can find the tech decks cheap on e bay Eddie. Never hurts to look. If you can get one for $25 shipped that's not too bad for what it would cost to drive all over. Especially the Target exclusive ones.
 

G.I.*EDDIE

gobbles a LOT of cock
Founder
Mar 14, 2011
43,432
428
83
S.E. Mich :(
well, i don't make special trips or anything...but when me and the wife happen to be at a Target, i check...if i find some cool stuff, great...if not, no biggie...
 

MAJOR BLOOD

Size matters
Staff member
Mar 13, 2011
13,592
8
38
They are nice for one shots or even smaller set ups. Perfect scale though. That's what I like.