On the Workbench

Dropshipbob

Turtlenap, Hanger Alpha
Mar 29, 2011
6,922
92
48
Ed, the whole thing was mis-matched to begin with. The cab was two shades of green while the back portion was blue, it seriously needed one overall color. And for what it's worth, it looks blue in the photos, but the color is more teal (greenish blue). The can is labeled "Lagoon", never heard that used as a color. I guess I could have left the cab the color it was and tried to match the back part to it, but those greens are more a military color in my opinion.

V V, thank you.
 

Dropshipbob

Turtlenap, Hanger Alpha
Mar 29, 2011
6,922
92
48
Yet more work done. Found a lighter tone for the base color to give it some weathering, did some painting and detailing to the cab interior, painted and attached some detail to the outside of the cab. I think I'll be painting a white strip across the front and along both sides to break it up a bit. I'd like to possibly get some Japanese text added somewhere if I can find someone to translate. The grey details on the sides of the cab are not going to remain grey, they are painted that way for now to help them stand out and give them a base color for later layers. I'm having difficulty deciding how far to go with the cab interior. When it's all sealed up, much of what's their will be in the dark and at a angle where no one will be able to get a good look at it. Feels like I'm dressing it up for nothing. I also based it all in black and gave it a dry brushing of grey to simulate some sort of metal, but it still looks so plain and not very metal-like. But again, I don't know how far to go because of the problems I mentioned and I don't want to paint it in actual silver, that would just be too cliché. "It's in space, paint it silver!"
 

Attachments

  • v9.jpg
    v9.jpg
    1.9 MB · Views: 7
  • v10.jpg
    v10.jpg
    1.4 MB · Views: 9
  • v11.jpg
    v11.jpg
    2.1 MB · Views: 7
  • v12.jpg
    v12.jpg
    2.2 MB · Views: 8
  • v13.jpg
    v13.jpg
    2.1 MB · Views: 5
Last edited:

Dropshipbob

Turtlenap, Hanger Alpha
Mar 29, 2011
6,922
92
48
You could dry brush it with metallic paint???
As far as translating: Google translator is your friend followed by copying it to a clear print label

I could, but like I said, I wanted to somehow stay away from the "it's sci-fi, paint it silver!" trap...but I may have no choice.
I've been researching farm and agricultural vehicles as they seem to be the closest cousin to what I'm doing here, and their interiors are often pretty bland, gray, tan, off-white.

As for Google translator, is it accurate?


Nice job on the interior. Do you plan to add "glass"?

Yes indeed! Just have to get done with the interior first.
 

Contraband

Controlled Substance
Mar 26, 2014
2,159
22
38
Wtf is going on here?!?!

Merry Christmas Mickey Fickeys!!

Just started casting again this week. Starting big,..as in real big! Shrinking from 1:6!! Will post some stuff later tonight.

Finally,Contraband has returned to the Fighting 1:18th!! Can you smelll what the pressure pot is cookin’?
 

Dropshipbob

Turtlenap, Hanger Alpha
Mar 29, 2011
6,922
92
48
You saw what I'm up to, can't wait to see what new projects you have. The last thing I remember from you was some sort of Jeep you found at Wal-Mart and you had just started modifying it. Did you get to finish that?
 

G.I.*EDDIE

gobbles a LOT of cock
Founder
Mar 14, 2011
43,432
428
83
S.E. Mich :(

Finally, Contraband has returned to the Fighting 1:18th!!
 

Contraband

Controlled Substance
Mar 26, 2014
2,159
22
38
No Bob. I still have that Jeep somewhere in my possessions,but it’s a sorting situation at this point..but I fiddled with it recently,so it shouldn’t be difto find..there’s actually 3 versions of that Jeep now!! Adventure force loves them some Wrangler Unlimiteds! the Jurassic World legacy collection Jeep has the same length,and type axles..the wheels off that Jeep fit on the Walmart Wrangler Unlimited!! If you drill holes higher up on the undercarriage,you can slide lower the ride height of the Walmart Jeep,then put the JW wheels on it! Or,have someone cast the wheels(not me of coarse,lol)


Eddie! I’m making a smutty figure!! Your favorite! So NSW it’s awesome!!

Lemme rebuild a photo sharing account,and we can rock&roll..I have so much to rebuild&recover to be online again. I just rebuilt a iPhone 7plus to acquire the stuff to get on here as well as other sites,but I can’t seem to get into my imager
 

Contraband

Controlled Substance
Mar 26, 2014
2,159
22
38
Bro! Beyond that. Idk what I can properly post? If someone can hold my hand through adding the NSFW cover on the pics? These things get pretty luwd.

I have acquired this figure.

https://www.makigumo.com/portfolio/nsfw-white-cat/

The actual figure from Japan,and [BGCOLOR=transparent]It seriously looks like this,lol. Idk if you’ve ever seen the China anime copies of these things? Straight garbage! big ass seams,misshapen shit,..This thing tho! anyways,I’ve already taken it apart,and made my second attempt at a shrink in years! lol. The first thing I did was the final touch up shrink on Marvel Legends Shanna/She halk feet to match HACKS feet.. IDK who’s familiar with that figure? they’re actually highly detailed female feet! [/BGCOLOR]


[BGCOLOR=transparent]anyways,So I got this amazing 12” amazing simi-kinda-almost pornographic figure,and I’ve already made an attempt on resizing the torso. I’ll know more in a week or so,and it takes several shots to shrink from this large of a scale to 1:18 without degradation of the sculpt....it’s been a while too,and my materials are old AF! The confidence level got a bump from the feet! lol. Also know I need new hard plastic resin...I’m positive it’s bad.[/BGCOLOR]

[BGCOLOR=transparent]Burned through the last of my supplies! but I didn’t want to saw the leg nubs shorter,and ruin a $100 “toy” this is one big ass mold!! [/BGCOLOR]

[BGCOLOR=transparent]
[/BGCOLOR]

[BGCOLOR=transparent]Some of these things have all the details down below..this thing has hints..doesn’t get as bad as many,which I look forward to getting my hands on in the future,but for now I’m keeping to one project...a very slow one,lol.[/BGCOLOR]

[BGCOLOR=transparent]I want Disk Vision Elsa so damn bad!! But so spemdsif tho![/BGCOLOR]

[BGCOLOR=transparent]https://www.diskvision.org/GALLERY/fig009/ELSA_sum_hip.jpg[/BGCOLOR]

[BGCOLOR=transparent]Dat ass tho![/BGCOLOR]
 
Last edited:

Contraband

Controlled Substance
Mar 26, 2014
2,159
22
38
Oh! And while I was taking pics I had to play a little bit!!


And these Fortnite figures!! they’re absolutely awesome!! I bought myself one of everything for Christmas...all the single carded,the building set,the 4 pack,and all 5 crates...everything at retail too! Walmart&Game stop!! This guy is by far my favorite!


He’s Ragnorok from the 4-pack. Once I’m done with this female,expect to see some modifications to these guys going on! lol. this dude is sick!

Here’s the head I’ll be using on said female.


it’s a 4-piece head too! Resizing it will be tricky!
 

G.I.*EDDIE

gobbles a LOT of cock
Founder
Mar 14, 2011
43,432
428
83
S.E. Mich :(
Neither of those nudie figures look poseable. How are you going about this project?

Posting NSFW pics. If on phone, I have no idea. If on a laptop, right click the image you want to post, click copy image address, then in the text box here hit the little icon of the three dots and a down arrow and hit spoiler then continue (ignore the "enter spoiler title" or title it like "NSFW") then click between the spoiler tags in the text box to place your cursor there then click the mountain and sun icon (insert image) and click the little chain links and paste the image address you copied originally then hit "insert". Should end up like this:


K-Tiger

All solutions are final.
Founder
Mar 14, 2011
31,266
190
63
Ah, the joys of Japanese smut figures. It's fortunate they generally don't make them in 1:18.
 

Contraband

Controlled Substance
Mar 26, 2014
2,159
22
38
By doing what I was fiddling with all that time ago Eddie...


I cast the details onto an existing articulated tooled part. In this case casting a gashapon figure over a pythona cast. Before the issue was although the chest looked ok,the lower portion of the gashapon torso was extremely small,and lacked any details..plus,it was oddly proportioned. Coming from a larger,and more high end figurine the details are way more defined,and I can control the size better...instead of struggling to find something to fit inside the gashapon mold,I can make the hentai figure whatever size I want it to accommodate any base figure I chose....Hacks,gijoe,marvel,..nothing a fine tune shrink after a good measuring with a digital caliper,and a calculator can’t solve..

That Diskvision Elsa tho!! That’ll be my treat to me if I pull this off...
 

Dropshipbob

Turtlenap, Hanger Alpha
Mar 29, 2011
6,922
92
48
Contraband, I have that JW Jeep, it's pretty nice and wasn't much more expensive than that Wal-Mart Jeep....and I don't even need to fiddle with the tires on the JW version. :)

Also, I've got into molding and casting a little bit myself over the last year. Just a few pieces that I needed extras of for different projects and a whole lot of molds of random bits and pieces that I liked and wanted to use as background pieces and detailing.
 

Contraband

Controlled Substance
Mar 26, 2014
2,159
22
38
Yeah,I’m ordering some tonight.

Try SmoothOn Mold Max 27T

Idk what you’re using as mold boxes? I like legos lines with blue tape. There’s a simple mathematical calculation to figure out how much mold maker to use with legos as well.

count the blocks,and multiply. Let’s say a mold box’s international dimensions is 3 blocks wide,10 blocks long,and 5 bricks high...3x10x5=150,then multiply what you get X 2=300,move the decimal two places,...3.00..so,3oz of 27T by weight. That’s without catalyst.....it’s a pattern I kept seeing repeat as I made molds..it’s not an exact science. The larger the mold the more you need to pad that number..if you where making multiples like three 3oz molds I’d say pad another.5oz to that total of 9oz ....if you don’t have enough mold maker that’s fine. You can put in the tank what you have poured..let that cure,then pour more on top of that...it’ll be fine. I’ve done it myself many times...large items without a lot of displacement like capes,and webgear tend to take more moldmaker to fill the mold,because the obvious less internal volume taken up by the part that has far less displacement then heads,or limbs.

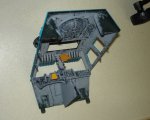
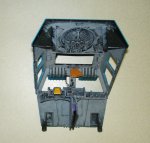
Now,on big items like this torso for example..I measure the inside of the mold box,and make a replica of it from cardboard sealed up with painter’s tape. Put the item inside,fill it with water,then measure how much water by valume. That’s how much mold maker I use on my LEGO mold. Example for that was when I made the last mold of a 1:6 torso. It’s huge,so it’s going to take a lot of volume. I wanted to know the exact amount of materials needed...
 
Last edited:

Dropshipbob

Turtlenap, Hanger Alpha
Mar 29, 2011
6,922
92
48
The mold boxes I built, I used cardboard, foam board, I even used laminated floor panels on one....really it was whatever I had on hand that was cheap or free, Hell, I even used clay a few times. Glued them together with hot glue (not the clay molds of course). There were a few times I didn't have enough molding material, but as you said, you can just let it sit till you get more and add to it without issue. There were also a few times I mixed TOO MUCH molding material...but I was smart enough to have a few items that were ready to be molded sitting of to the side for such an event. I tried to waste as little as possible.

I have heard about the SmoothOn materials, but I was sticking with the Alumilite stuff at HL because I could use their 40% off coupon, and all I had to do was walk in the store to get it, no waiting for it to be shipped. BUT...you do get more for what you pay with the SmoothOn stuff, so if I can get around the wait time, it's probably a better buy in the end.
 

Contraband

Controlled Substance
Mar 26, 2014
2,159
22
38
It’s literally a couple days,lol.

I’ve never tried the hobby lobby stuff,so idk...it’s expensive AF,and the package looks small. I’ve used a lot of different materials smooth on sells,..literally dozens..different mold makers,different plastics,mixed them in different ratios. with what Dennis taught me combined with my own trial&error I’m confident I can copy any toy,model,figurine,or whatever from head to toe,and make in most cases make it look,feel,and work as good or better then the original. when I/if I get back in the groove,if that’s even possible now.
 

Dropshipbob

Turtlenap, Hanger Alpha
Mar 29, 2011
6,922
92
48
Once you get back into it, I bet you'd pick it right back up.

The stuff I've done is easy in comparison to what you've done, I think what I've done is called "slump" molding? It's just one side of one item with the opposite side glued to the mold container base. The rubber I've used is that silicone stuff, so it's pretty forgiving and items demold out of it super easy. The only thing I've screwed up was the wheel I molded for my present project. I used some sort of RTv rubber, but ended up only having enough to mold half. So I went out and grabbed a second container but didn't check, I just assumed it was the same thing. I get home, mix it and pour and it's a pink color, not the off-white of the first pour. I had grabbed a container of silicone rubber! So I had a mold that had two different types of rubber in it! Luckily for me the two attached to each other and I was able to make two pulls which was all I needed. They weren't well aligned, but good enough for me.
 

Dropshipbob

Turtlenap, Hanger Alpha
Mar 29, 2011
6,922
92
48
More work on my "sci-fi" colony tractor.
 

Attachments

  • v14.jpg
    v14.jpg
    2.8 MB · Views: 8
  • v15.jpg
    v15.jpg
    2.9 MB · Views: 9
  • v16.jpg
    v16.jpg
    2.7 MB · Views: 10
  • v17.jpg
    v17.jpg
    1.9 MB · Views: 9

G.I.*EDDIE

gobbles a LOT of cock
Founder
Mar 14, 2011
43,432
428
83
S.E. Mich :(
Looking good. I like that details you added the wheel structures. Though they look like they could use some more weathering.
 

Dropshipbob

Turtlenap, Hanger Alpha
Mar 29, 2011
6,922
92
48
I picked up a K2SO figure from Star Wars Rogue One, and I have to say I really like this figure! This is the second one I've bought and I'm getting all sorts of ideas on how to customize it. A military robot with WWII era weapons, a backpack, all sorts of markings, maybe painted all over in red....I know some of that doesn't sound terribly original, just stuff off the top of my head. Maybe switch out it's noggin for something else, maybe even a human skull, go all bio-mechanical....so many ideas. I wish I could find more at $4 each.
 

K-Tiger

All solutions are final.
Founder
Mar 14, 2011
31,266
190
63
I never did grab a K-2S0.
Something to further nurture the bio-mechanical angle.
 

Dropshipbob

Turtlenap, Hanger Alpha
Mar 29, 2011
6,922
92
48
Oh man, I like that...I like that A LOT!

The down-side to this version of K2SO is that he's 5poa....actually, it's more four but it has a double ball joint in the head. They had an earlier version that was almost the same, except they had ball joints where there were normally cut joints. That didn't mean much, but it was better than cut joints. I experimented on him and created hinge joints in the elbows and knees, which worked but were a bit ugly/messy. I'll probably do the same to this new one and maybe go further and add hinges to the wrists and ankles. I have to do something because the way he is now he's got pigeon toes.
 

Dropshipbob

Turtlenap, Hanger Alpha
Mar 29, 2011
6,922
92
48
Did a shit ton of weathering to this thing the other day, not TOO much more left to go.
 

Attachments

  • v18.jpg
    v18.jpg
    2.7 MB · Views: 3
  • v19.jpg
    v19.jpg
    2.1 MB · Views: 3
  • v20.jpg
    v20.jpg
    2.9 MB · Views: 2
  • v21.jpg
    v21.jpg
    2.9 MB · Views: 4
  • v22.jpg
    v22.jpg
    2 MB · Views: 2

Dropshipbob

Turtlenap, Hanger Alpha
Mar 29, 2011
6,922
92
48
Oh you bet! But I need to finish all the weathering. Also need to finish adding some ladder rungs going up one side, lots of lights (non-working) and more hoses.
 

Dropshipbob

Turtlenap, Hanger Alpha
Mar 29, 2011
6,922
92
48
Finished adding elbow articulation to the Jurassic World Masie figure that I'm going to turn into an improved "Newt" for my ALIENS universe. I took a pair of articulated GI Joe hands, shaved off the fingers, drilled a small hole in that area, inserted a small screw and then grinded the head of the screw off. I then drilled holes into both parts of both arms and popped all the parts together. The lower arms accepted the screw that I created, so they were actually screwed on. The new joint seems pretty stable. I know the color is off, but in the end the arms are going to be painted a dark color, so this will help hide any "paint rub" in that area.
 

Attachments

  • DSC00267.JPG
    DSC00267.JPG
    1.8 MB · Views: 16

Dropshipbob

Turtlenap, Hanger Alpha
Mar 29, 2011
6,922
92
48
Man, you would ask me to do that after I just left it AND my camera at home. Here's the group photo that Contraband took a few weeks ago, the adult Jurassic World figures are just a stitch shorter than a modern Joe figure.
 

Attachments

  • 1leJrGy.jpg
    1leJrGy.jpg
    703.1 KB · Views: 9